Custom Sandbox Districts
A sandbox district is a demo district account, populated with demo data, that your team manages for development purposes. Developer accounts are automatically populated with a sandbox dataset upon creation. Clever also allows developers to create custom sandbox school districts to help build and test your integration if necessary.
Each application may create sandboxes adhering to the following guidelines:
- Maximum of 5 sandbox districts
- Name districts with the following convention:
#DEMO <app name>(e.g.#DEMO ReadingFun Sandbox District)
Creating your own sandbox is a great way to understand the experience districts have setting up Clever and your application. You'll also have the opportunity to control the data Clever sends your application. You'll be juggling multiple accounts to administrate your sandbox.
Creating a sandbox district
To create a sandbox district, reach out to our support team with the following information:
- A valid email address not currently associated with any application or sandbox district accounts
- The desired name of the sandbox district
Our team will get you set up with a new custom sandbox!
Setting up your sandbox
Step 0: Finishing account creation
When our team creates a sandbox district on your behalf, you'll receive an email at the address you specified that welcomes you to Clever and asks you to set up the password for the district administrator account we've created for you.
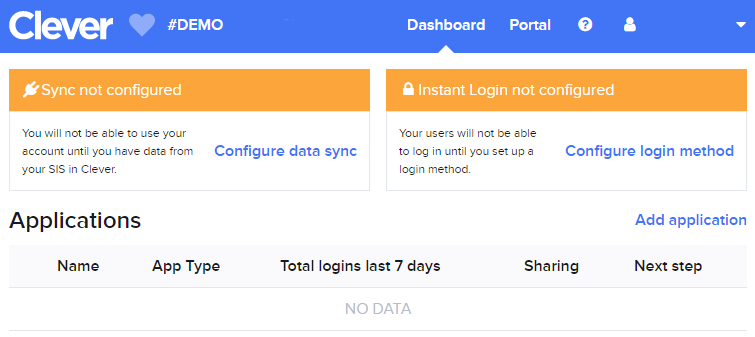
Once you've set up your account, you'll be able to log in to the district dashboard:

Step 1: Configure data sync
Click the "Configure data sync" link to get started.
You can choose any SIS from this list as long as you make sure that you select the option to Manually send data to Clever with SFTP
Upon completing this step, you'll be taken to the Sync Settings page, which will allow you to sync data. Details on how to do this are covered in the Uploading Data section below.
Step 3: Configure Instant Login
Click the "Home" icon to return to the dashboard main page and click the "Configure login method" link.
Click the "Add IDP" button in the upper-right corner to add additional login methods.
Choosing an Identity Provider
You can add as many IDPs as you'd like, but at a minimum we recommend choosing the Clever Authentication option as it is easiest to set up and best for general testing use.
Configuring Clever Authentication
Upon selecting Clever Authentication, you'll be presented with a walkthrough that allows you to set the username and password formats for each user type.
For testing purposes, we recommend choosing the following username and password formats for Clever Authentication:
- Students: Student number / Student number
- Teachers: Teacher number / Teacher number
- Admin: Staff ID / Staff ID
Additionally, we recommend unchecking the "Allow user type to change their passwords" and "Force user type to change their password on first login" options to keep the credentials consistent across your testing period.
Uploading data
Now that you have a sandbox district and have added your application, it's time to populate it with data! If you set your district up with the SFTP sync method, you navigate to Settings > Sync Settings to sync data:
You can either connect via a SFTP client or use the 'Upload' link to submit your files - please note that you will need to provide at least the following five files every time you sync data:
schools.csvstudents.csvteachers.csvsections.csvenrollments.csv
Note: admins.csv, which is used to provision school admins, is not required.
Sample data
- Clever USD (default) - a 249-school data set made up of anonymized real district data. This provides a realistic dataset for a large school district.
- Certification ISD - a 5-school data set that we built to contain as many edge cases as possible. This allows you to test the worst of the worst district data. For more information, check out Testing Your Sync.
Linking a sandbox district to your dev app
Step 1: Grab the District Signup URL from your application settings
Step 2: Log out of your application acount and log in to your district account
Step 3: Navigate to your District Signup URL
Step 4: Complete the flow by answering the questions to add the application.
Linking a sandbox district to your PROD app
You'll need to use a different method to connect the sandbox to your production app.
Step 1: First, obtain the district ID of the sandbox through your dev app's District Overview page > click on the district > copy the "District ID"
Step 2: Switch over to your prod app using the drop-down menu at the top of your dashboard.
Step 3: In the search bar on the right, enter the sandbox district ID and invite the sandbox to connect.
Step 4: Log into the sandbox district, accept the request, and share data.
Step 5: Go back to your production app and launch the connection!
Sharing data
Once your data is synced, the next step is to share data with your application. To start, make sure you are logged into your sandbox district dashboard, and navigate to your application by clicking your app name/icon.
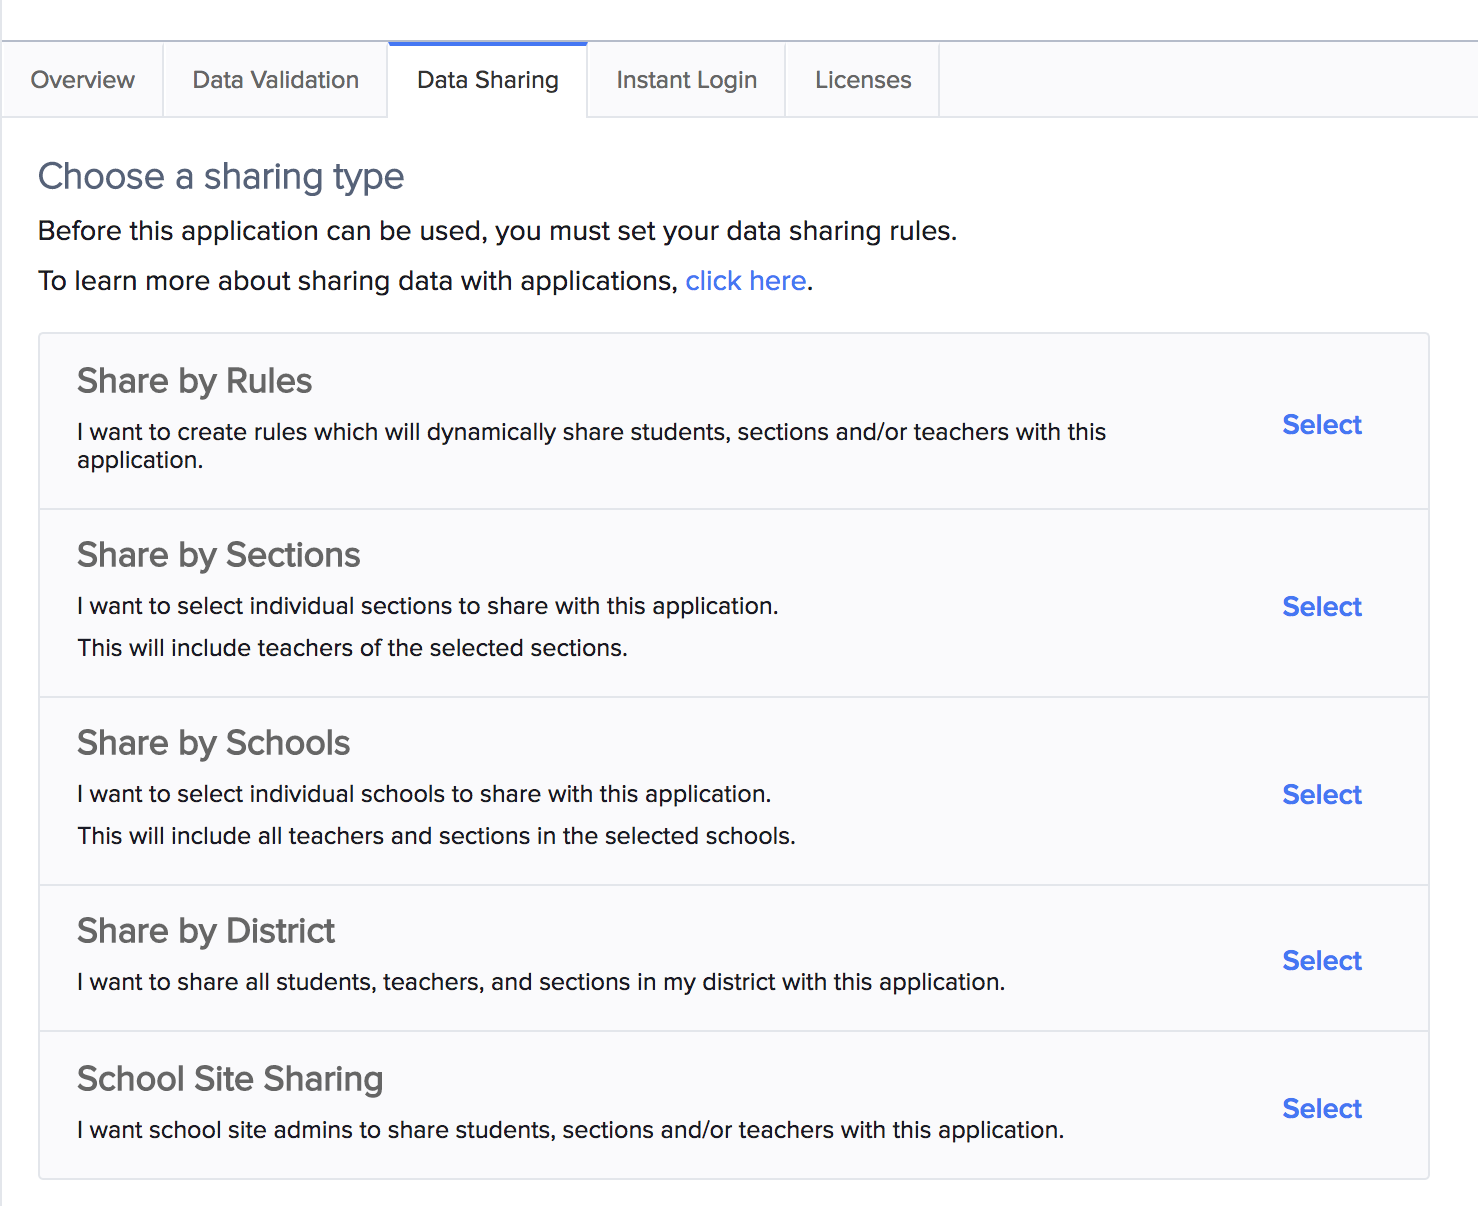
Next, click over to the "Data Sharing" tab:

For testing purposes, you'll usually want to share by district. If you'd like to better understand the sharing options or share a specific subset of data, check out our guide to sharing settings.
After you've shared data, save the changes.
Launch the district connection
As the final step, you'll need to launch the district connection to complete the setup process.
Go back to your app dashboard (log back in if necessary). On your Home screen, you should now see your new sandbox district marked with an orange "Setting Up" status indicator. On the right side of the page under Actions, click Launch Now.

That's it! You should now see the "Launched" blue status indicator for the new sandbox district.
To connect an existing sandbox district to additional applications, log in to your sandbox district and go to the application's District Signup URL. You'll then be prompted to authorize the additional application and share data!
Updated over 2 years ago
