Example OAuth/OIDC Walkthrough
Introduction
This guide will walk through the OAuth 2.0 authorization grant flow steps manually to obtain an SSO Bearer Token from the Clever API, which is used to log users into your application. There are two prerequisites that will need to be met before continuing:
- You have access to a Clever Developer Application.
- To follow this tutorial, we recommend using a Clever dev app that you have access to and can freely modify. To create a new dev app for free, please navigate to https://apps.clever.com/signup.
- You have access to Postman.
- Postman is a third-party software used for building and using APIs. To get started with Postman, see this link for download options: https://www.postman.com/downloads/
Setting an accessible Redirect URI
In the Dev account of your choice, log into the Application Dashboard and navigate to Settings > Instant Login and update the OAuth Settings so the first Redirect URI listed is https://localhost:3000. This sets the Redirect URI to be your local machine. Clever will always use the first Redirect URI listed by default. Once the Redirect URI has been populated, select Save.
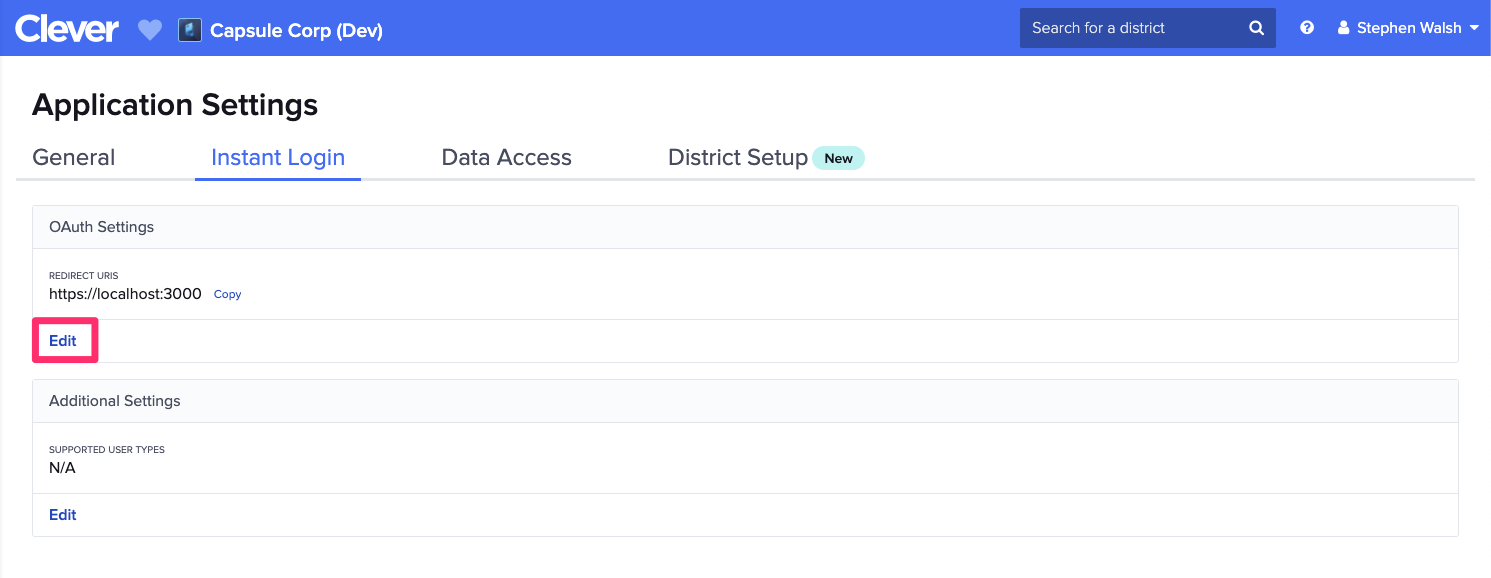
Screenshot of dashboard OAuth settings
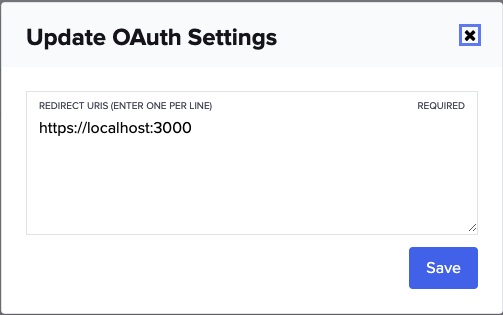
Screenshot of redirect URI settings
Setting up the query in Postman
The next few steps involve querying the Clever API in order to obtain the authorization code from Clever, and subsequently, the Bearer Token. The authorization code is only valid for a minute once it's been provided on the API, so before moving forward, let's go ahead and set up the query we need to run in Postman to save time.
In Postman, you'll want to create a new POST query, then set the URL as https://clever.com/oauth/tokens:
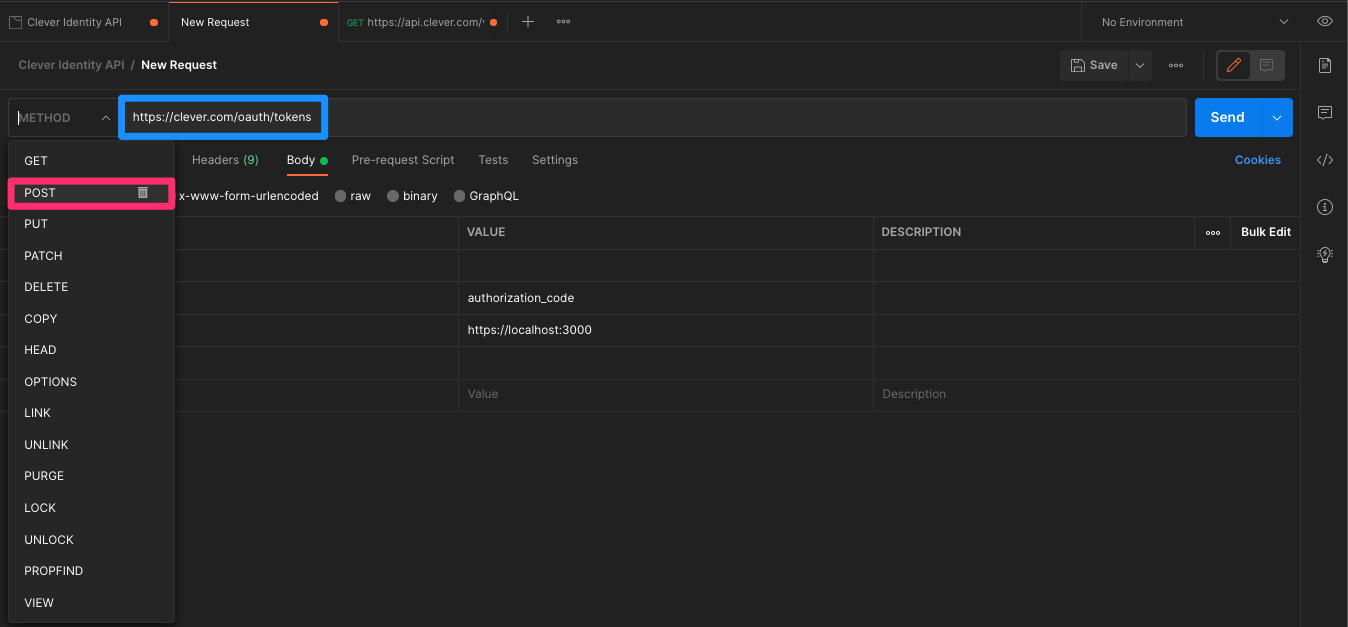
Screenshot of /tokens POST in Postman
Next, navigate to the Body tab underneath the URL and input the following info:
| KEY | VALUE |
|---|---|
| code | |
| grant_type | authorization_code |
| redirect_uri | https://localhost:3000 |
In the table, you'll notice that the value for code is blank. We still need to pull the code for this query, but since the Authorization Code is only active for a minute, it's wise to set all of this up before-hand.
You'll also need to provide your Dev app's Client ID and Client Secret under the Authorization tab in Postman. For Type, you'll want to select the Basic Auth option, then paste the Client ID and Client Secret into the Username and Password fields, respectively:
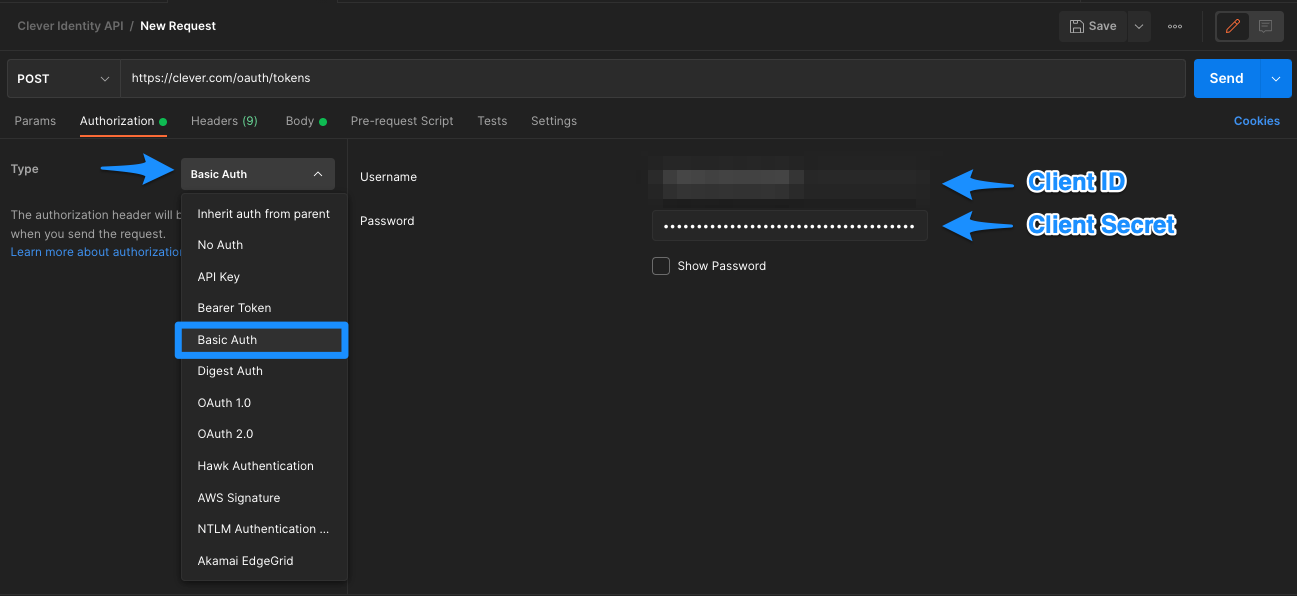
Screenshot of Postman authorization setting
Obtaining the Authorization Code
Next, copy this Log in With Clever (LIWC) sample URL: https://clever.com/oauth/authorize?response_type=code&redirect_uri=https%3A%2F%2Fexample.com&client_id=YOUR_CLIENT_ID. This link can also be found on this page in our dev docs, in case you need to reference this info in the future.
With the LIWC URL in hand, navigate to your browser of choice and paste the link, but don't hit enter. First, go back to Hall Monitor and copy your dev app's Client ID from the Info page. You'll then paste the Client ID to replace YOUR_CLIENT_ID in the URL:

LIWC sample URL client ID param
You'll then need to populate the redirect_uri here:

LIWC sample URL redirect URI param
With the https://localhost:3000 populated, this is what the URL should look like:

LIWC sample URL
Once the URL is complete, copy the URL and open a new tab in your browser, then paste the Authorization Code into the URL bar. It should bring you to a page where you need to login to Clever. You can use your demo district with the demo Clever USD data set and login using a sample student.
TIPS:
- For a quick user, try using this student number: 243615677.
- You can also paste the district id in the school-picker for your demo district to quickly get to the login page.
After attempting to login to Clever, you should see this error page:
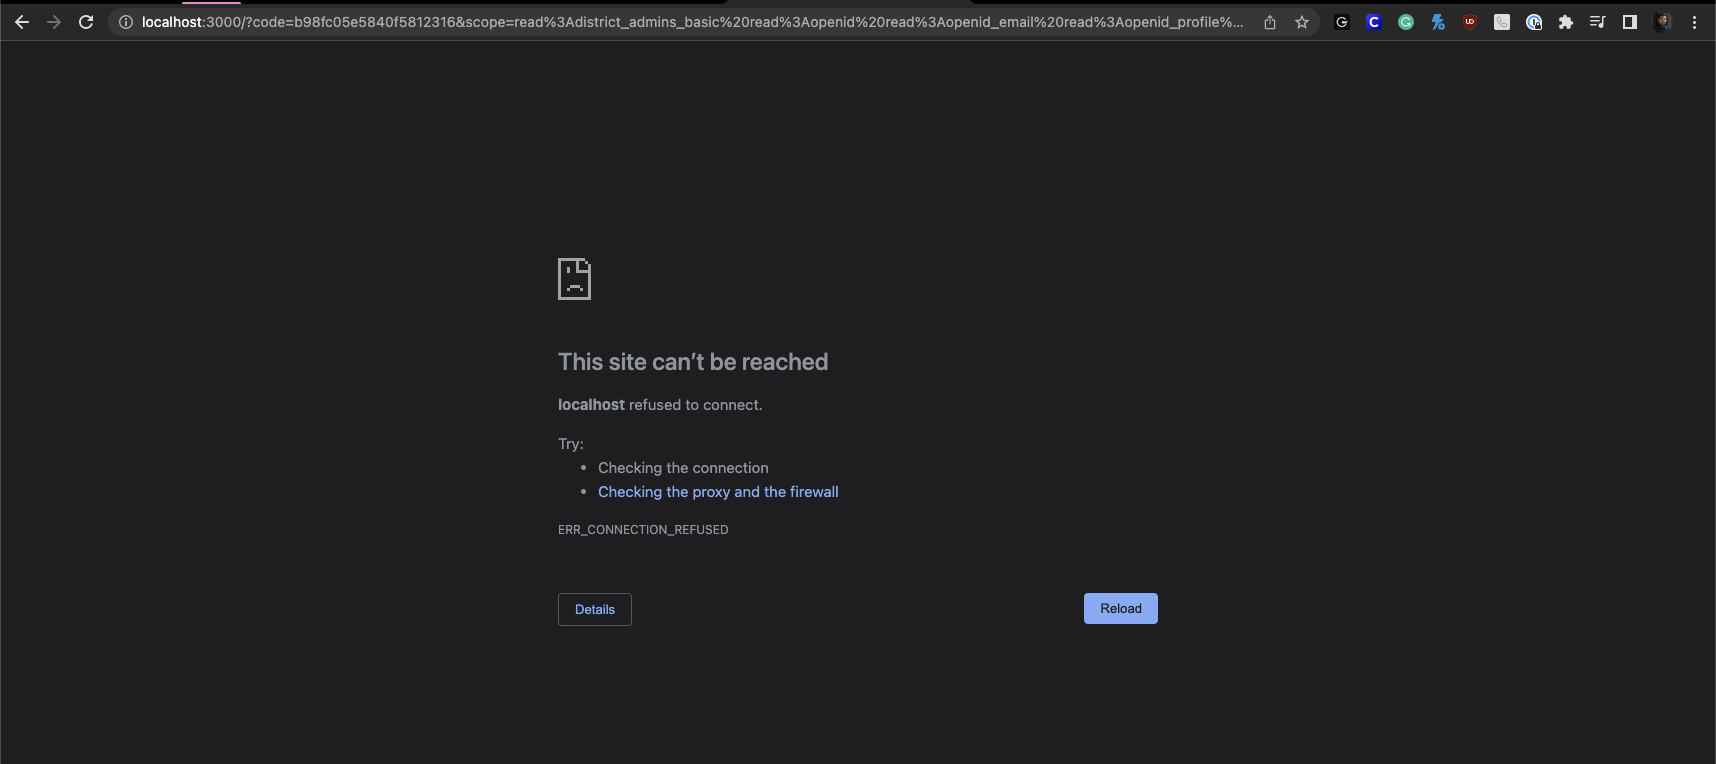
Screenshot of authorization step in OAuth flow
You can find the Authorization Code here in the URL:

Authorization code in URL
Obtaining the Bearer Token
The next step is to paste the code into Postman and query the Clever Identity API to obtain the Bearer Token - in the next 60 seconds!
You'll need to paste the Authorization Code in the Value field for code, then click Send:
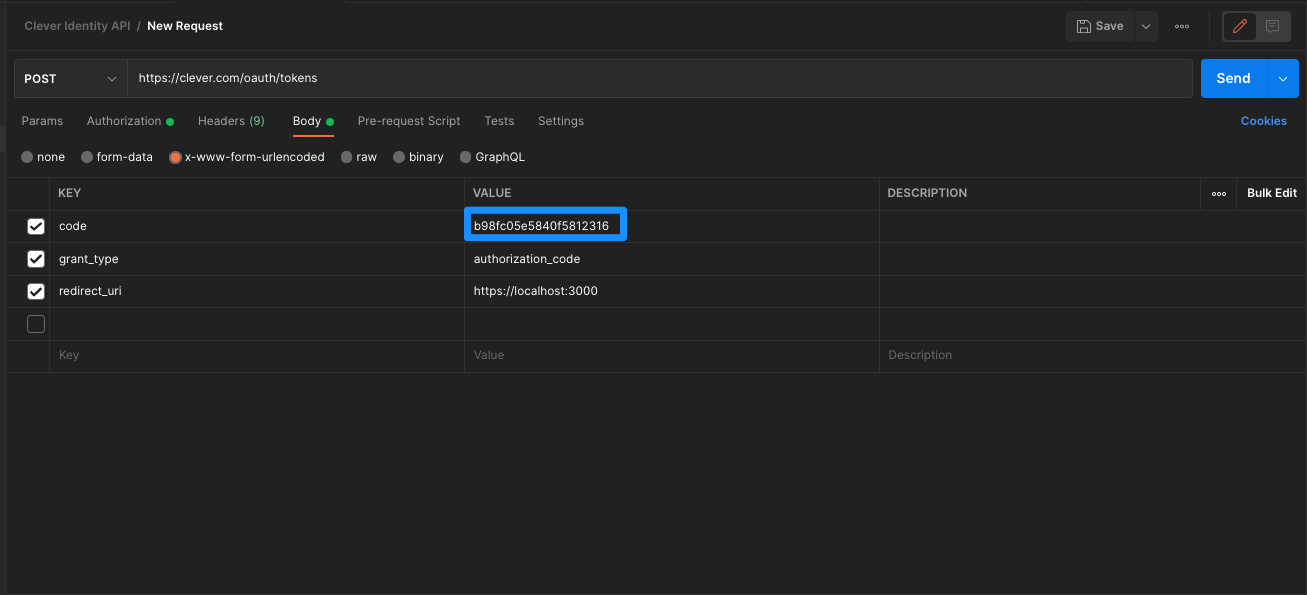
Screenshot of authorization code in Postman
Using the access_token for other API Endpoints
Upon a successful query, you should see the access_token. You may also see an id_token if your dev app is configured to use OpenID Connect (OIDC).
The access_token can be used to query www.clever.com/v3.0/me. This can be done easily in Postman by opening a new GET query, then going to the Authorization tab and setting the Type to Bearer token. You can then paste the access_token into the field and hit Send!.
For the id_token, you can paste this into a JSON Web Token decoder that allows users to decode such tokens.
Updated 4 months ago
