
Testing - Clever Single Sign-On
Clever Complete Agreement RequiredThis feature is included with a Clever Complete subscription. Sign up here or email your Application Success Manager to learn more.
Prerequisites
A few things to consider before you start testingWhich integration type are you testing for? It's important to maintain the distinction between Clever Single Sign-On and Clever Library SSO when testing your SSO integration. It's very easy to get mixed up if you're not paying attention.
Which users should be used to test each integration? Please note that in most cases, there are pre-determined users you should be testing with for each integration. Please keep an eye out for that information detailed below.
What scopes do you have access to when testing each integration? Both integration types have different access levels when it comes to fields. On top of that, having Clever Secure Sync enabled on your account will also affect the outcome of your testing. Be aware of what you're testing for and what you're looking to certify for. If you need a refresher, please refer to LINK.
Settings
Before you get started with testing, make sure that you have the following settings configured. Without them, your SSO integrations will not work. Both settings can be found on the same page in your developer dashboard: Settings > Integration
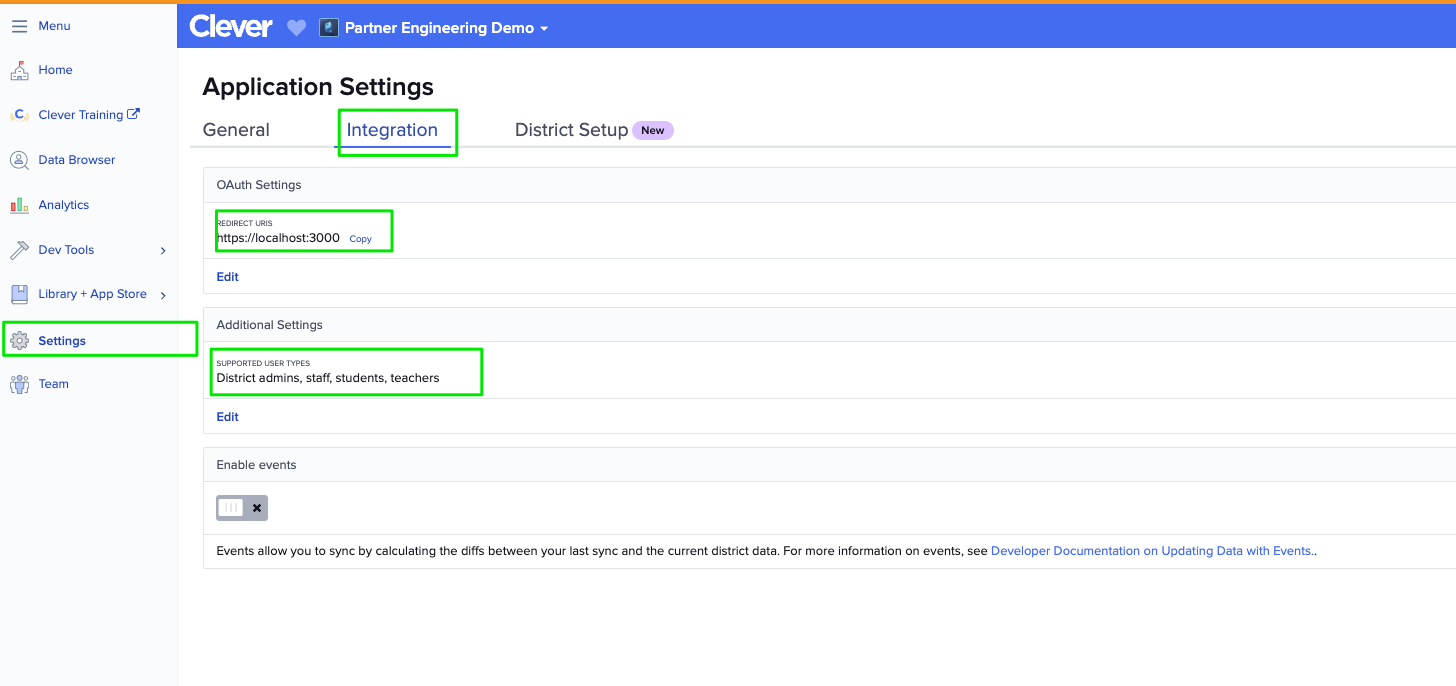
- Supported User Types: This setting controls which user types can use your SSO integration. Note: The Library integration type only supports teachers and students.
- Redirect URI:
- The redirect URI is used to securely return the authorization code or access token to your application after the user authorizes access. It ensures that the token is sent to the correct location, mitigating risks like token leakage or unauthorized access.
- This setting is an allowlist of redirect URIs that Clever will send an authorization code to. Any authentication requests sent from a redirect URI that is not recognized from Clever will result in an error.
- If no redirect URI is specified in an authentication request, Clever will default to the first redirect URI in the list. This is important behavior to consider during the certification process. If you do not have a publicly accessible redirect URI set as your default one, we will not be able to certify your integration.
Understanding the SSO entry points
There are a number of ways that users in Clever can initiate an authentication request. Be sure to review Clever SSO Overview. It's important to account for all these entry points to ensure that your integration is working in all cases. If your SSO integration requires a state parameter, the Clever Portal-initiated SSO may cause you trouble. Be sure to take a look at this documentation about state parameters.
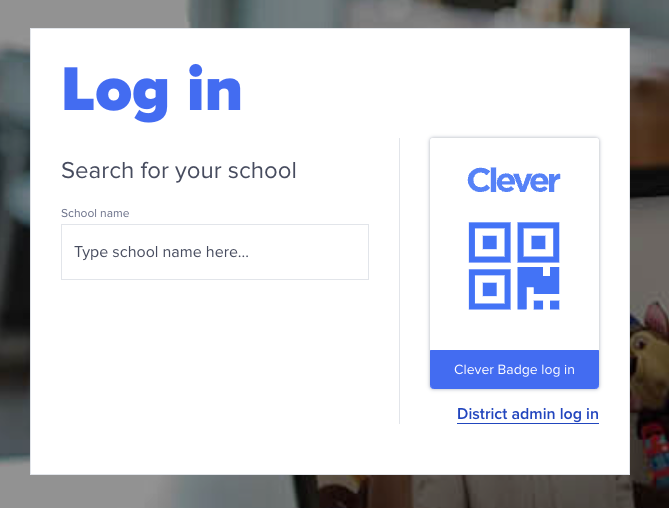
Pro tipIf your browser does not have the correct district context, you will come across a "school picker". You won't be able to find your sandbox district by searching the school names. Instead you should be using your district ID. Click into your sandbox district on the developer dashboard to find the district ID.
To skip this step during testing, you can hardcode the district ID into your authorization URL as such:
https://clever.com/oauth/authorize?response_type=code&redirect_uri=&client_id=&district_id=
Testing is a key part of certificationIf you're not yet familiar with how certification works with Clever, take a look at this section.
Testing District SSO integrations
SSO through the Clever Portal is strongly recommendedA large majority of Clever end users use the Clever Portal for SSO into their applications. Clever strongly recommends that your integration should support at least SSO via the Clever Portal.
SSO through a Log in with Clever button is optional.
What to look out for
- Are the user's name and email visible in your UI?
- If there is an existing user session in your application, does a new authentication request from Clever override that session?
- Is there a logout button?
Test Users
By default, you will have access to a useful number of test users for each integration type. However, context really matters. Pay close attention to which users you're testing for and for which integration type. Take a look at the SSO Test Plan linked below for an integration-specific guide for testing SSO.
Want to use our streamlined test plan?If you're looking for a way to quickly test out your SSO integrations without diving into the nuances, we've developer an SSO Test Plan that you can use to quickly get your testing out of the way in preparation for certification.
Check out this SSO Test Plan.
Ways to test
- SSO Test Plan (RECOMMENDED)
Please be sure to use the spreadsheet linked above for a comprehensive guide on how to test. However, we've listed some example default credentials below:- Student: username and password are the student's
student_number(e.g., 243615677) - Teacher: username and password are the teacher's
teacher_number(e.g., 215041) - School admin: username and password are the school admin's
staff_id(e.g., 12342)
When testing, you may come across the School Picker if the browser does not have your sandbox district instance cached. To find your sandbox district login page, input your sandbox district IDinto the search. You can then click into your sandbox district login page in the dropdown.
- Student: username and password are the student's
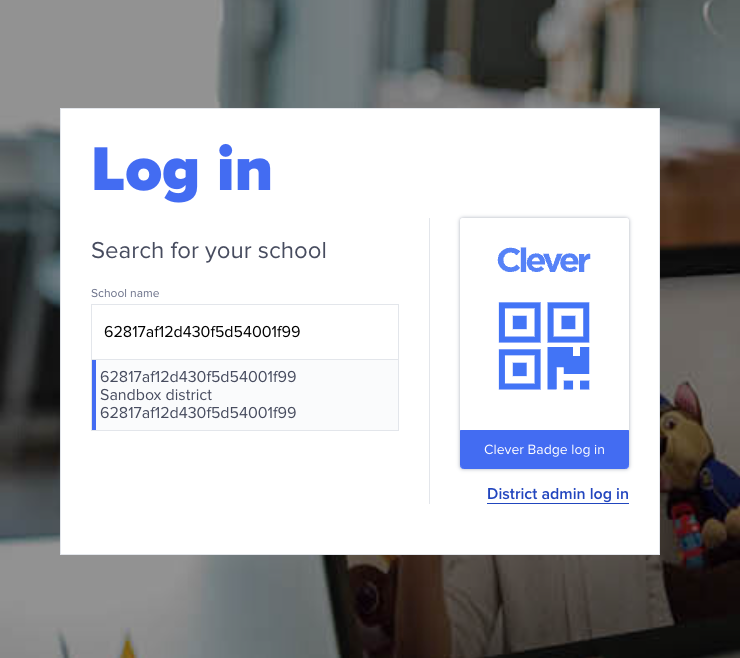
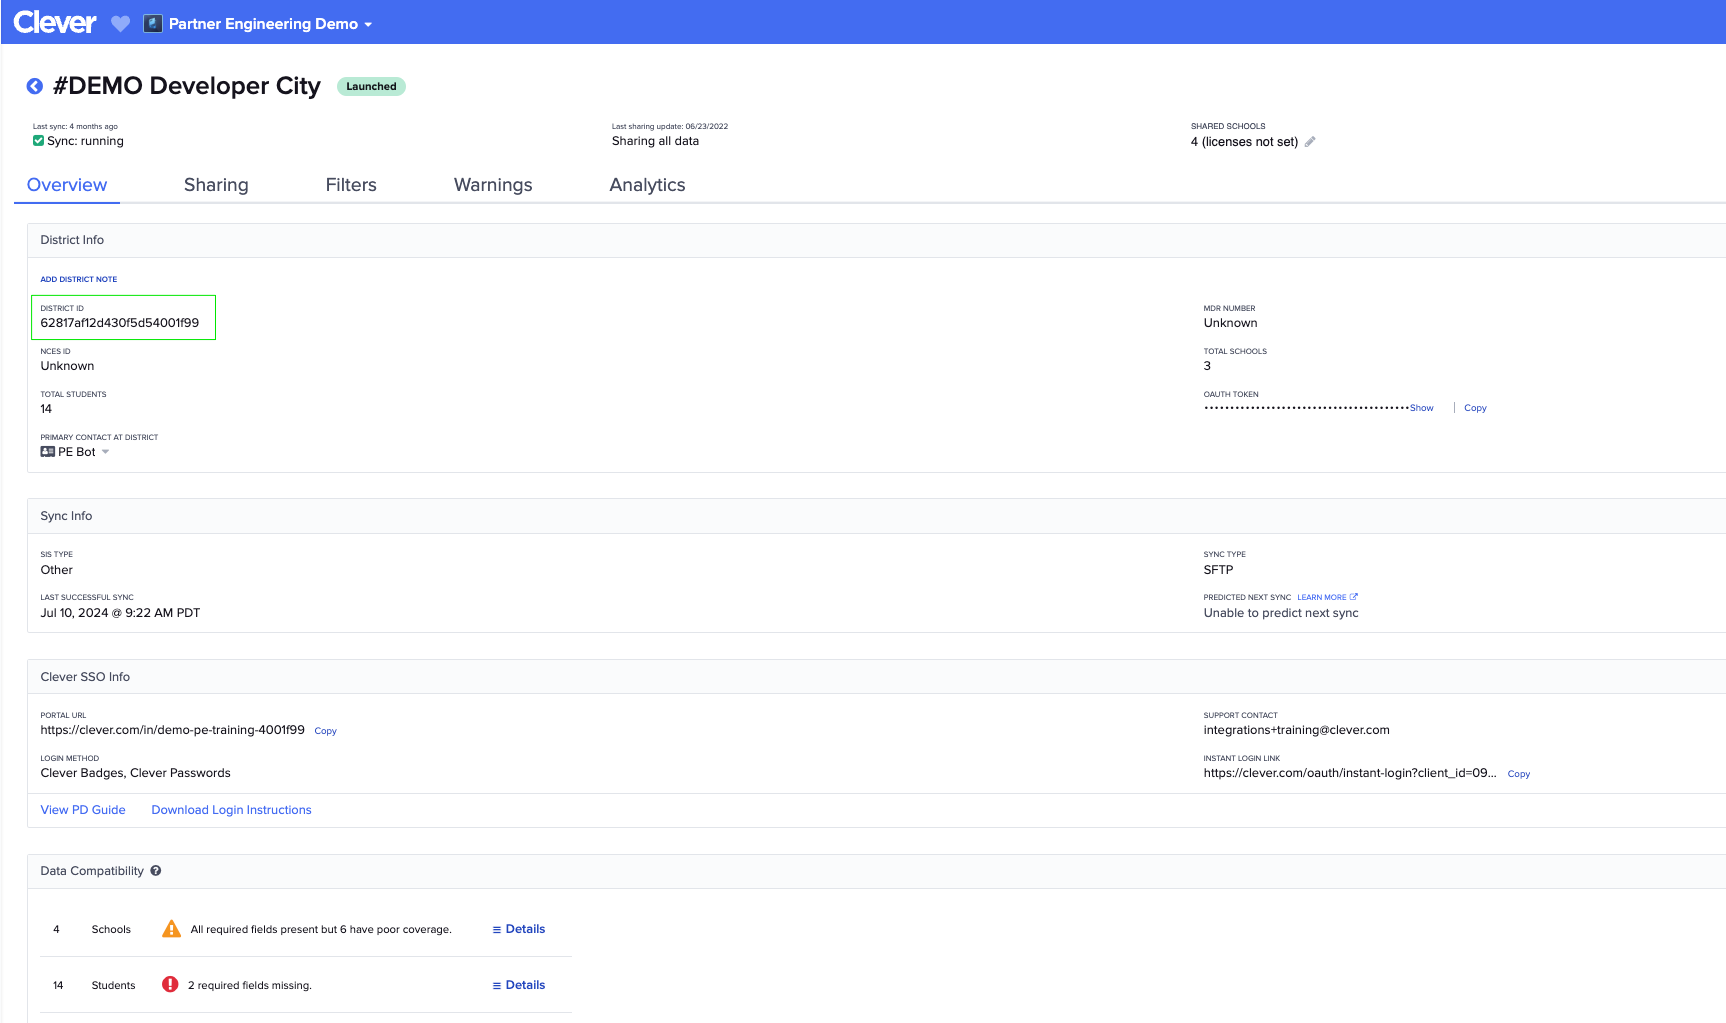
You can find your sandbox district ID in your dashboard.
-
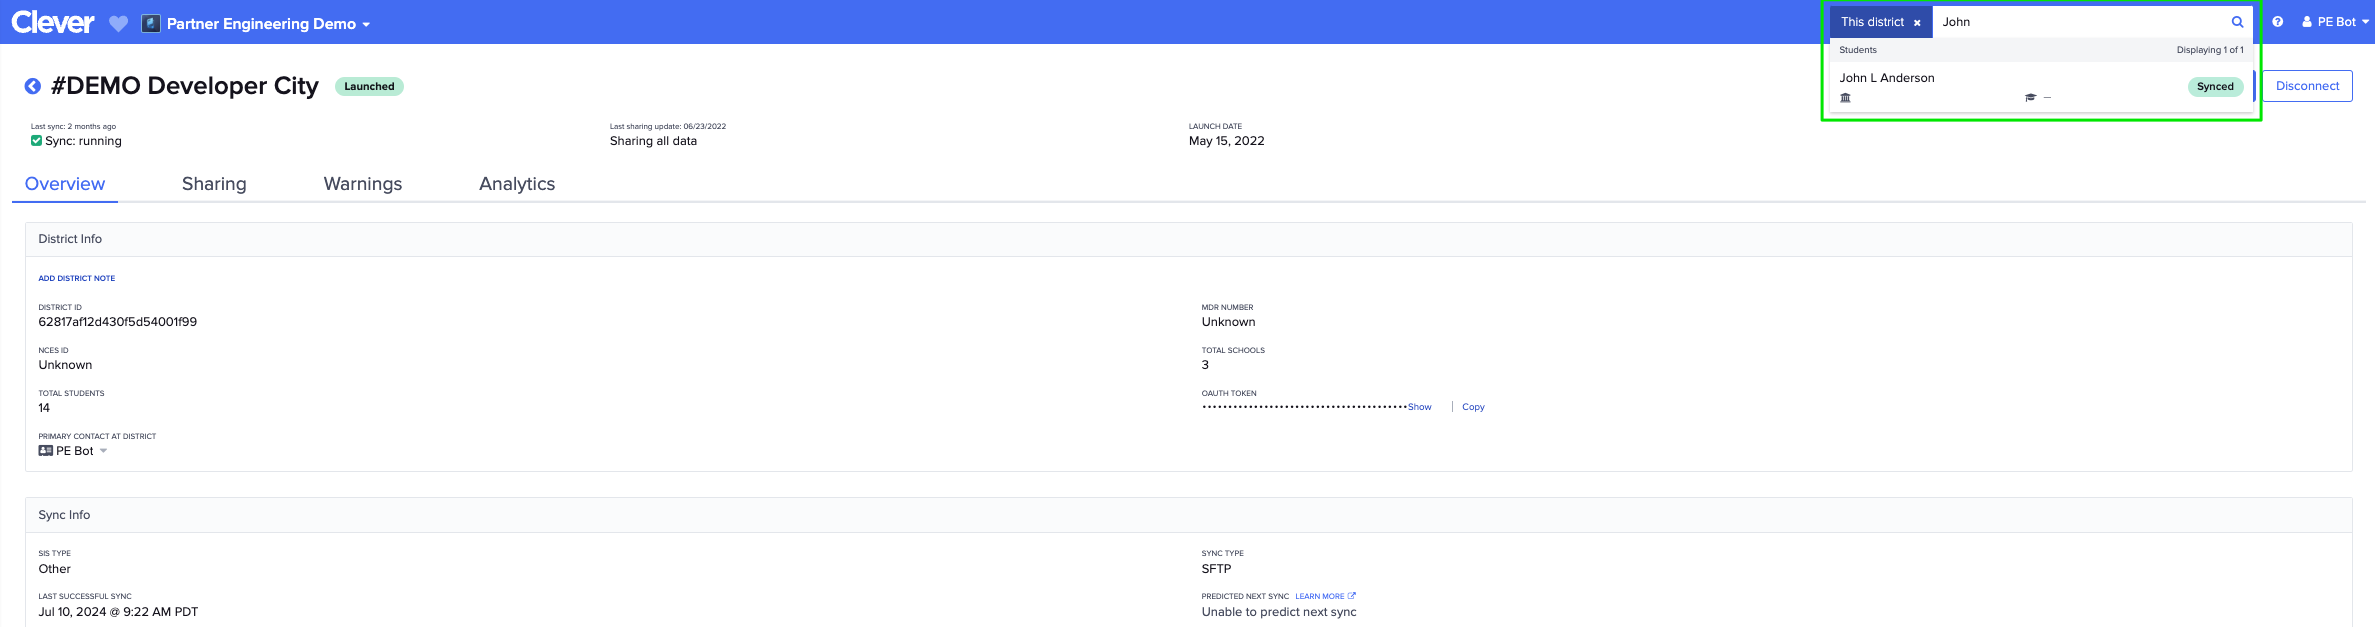
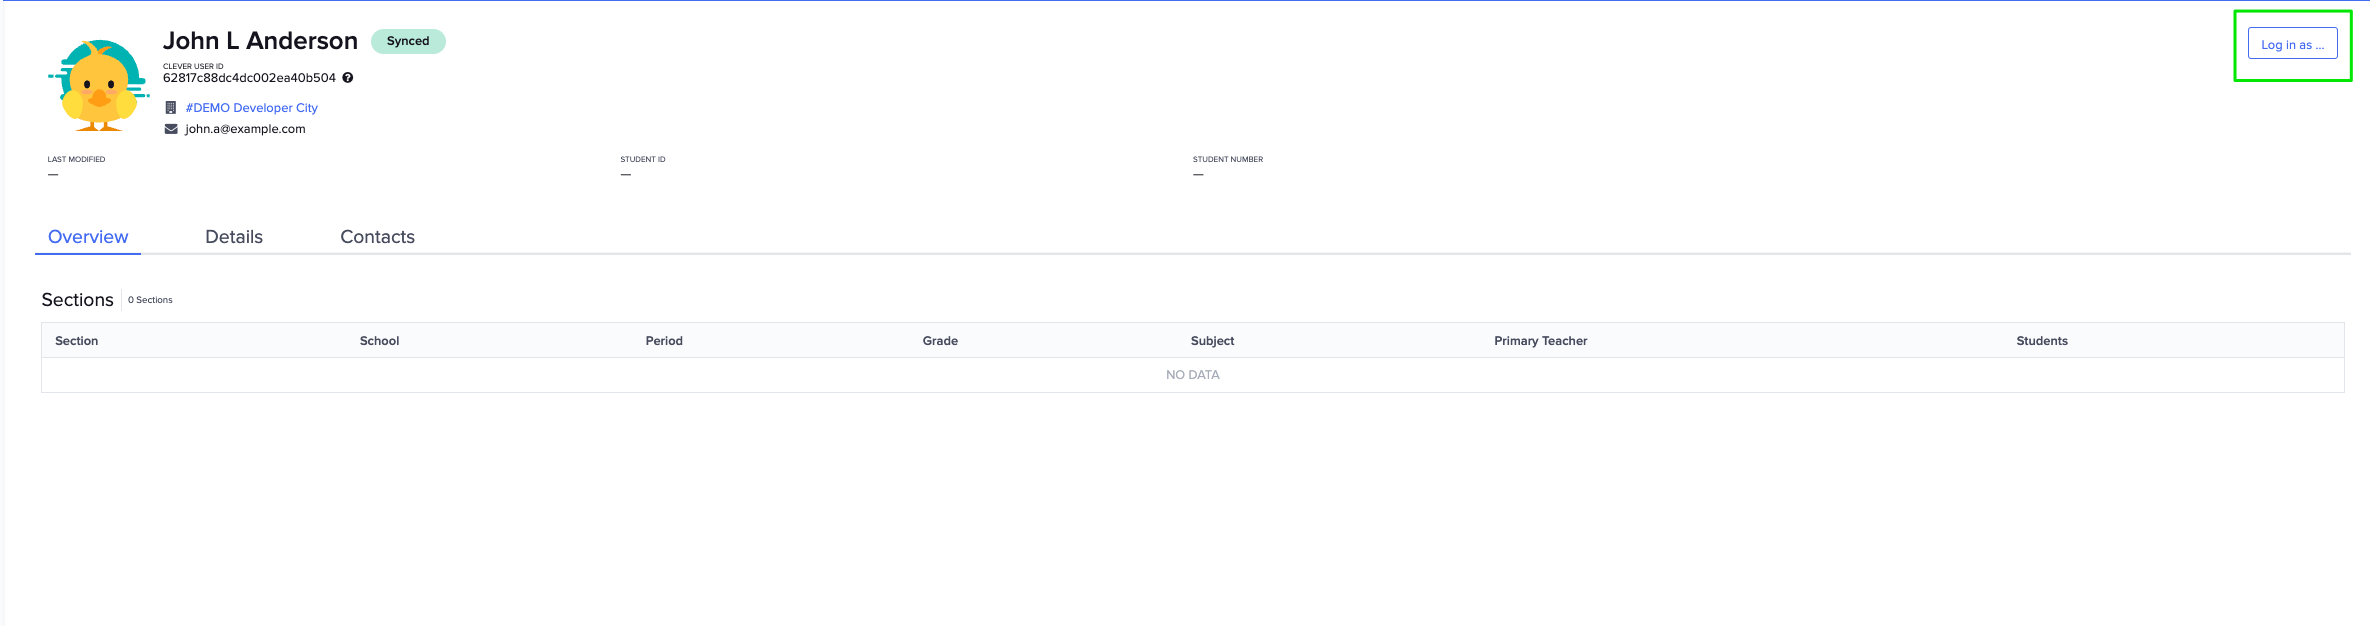
Developer app dashboard shortcut
As a feature that's only available with a development (non-production) account, you can simply type in a test user's name when in the context of a district. Once you select the user, you should find a "Log in as.." button in the top right corner.
NOTE: This only works in your developer account and will not work in production if you don't have Clever Secure Sync access.
-
Through impersonation of your sandbox district admin
See the section below for more information about managing your sandbox district. -
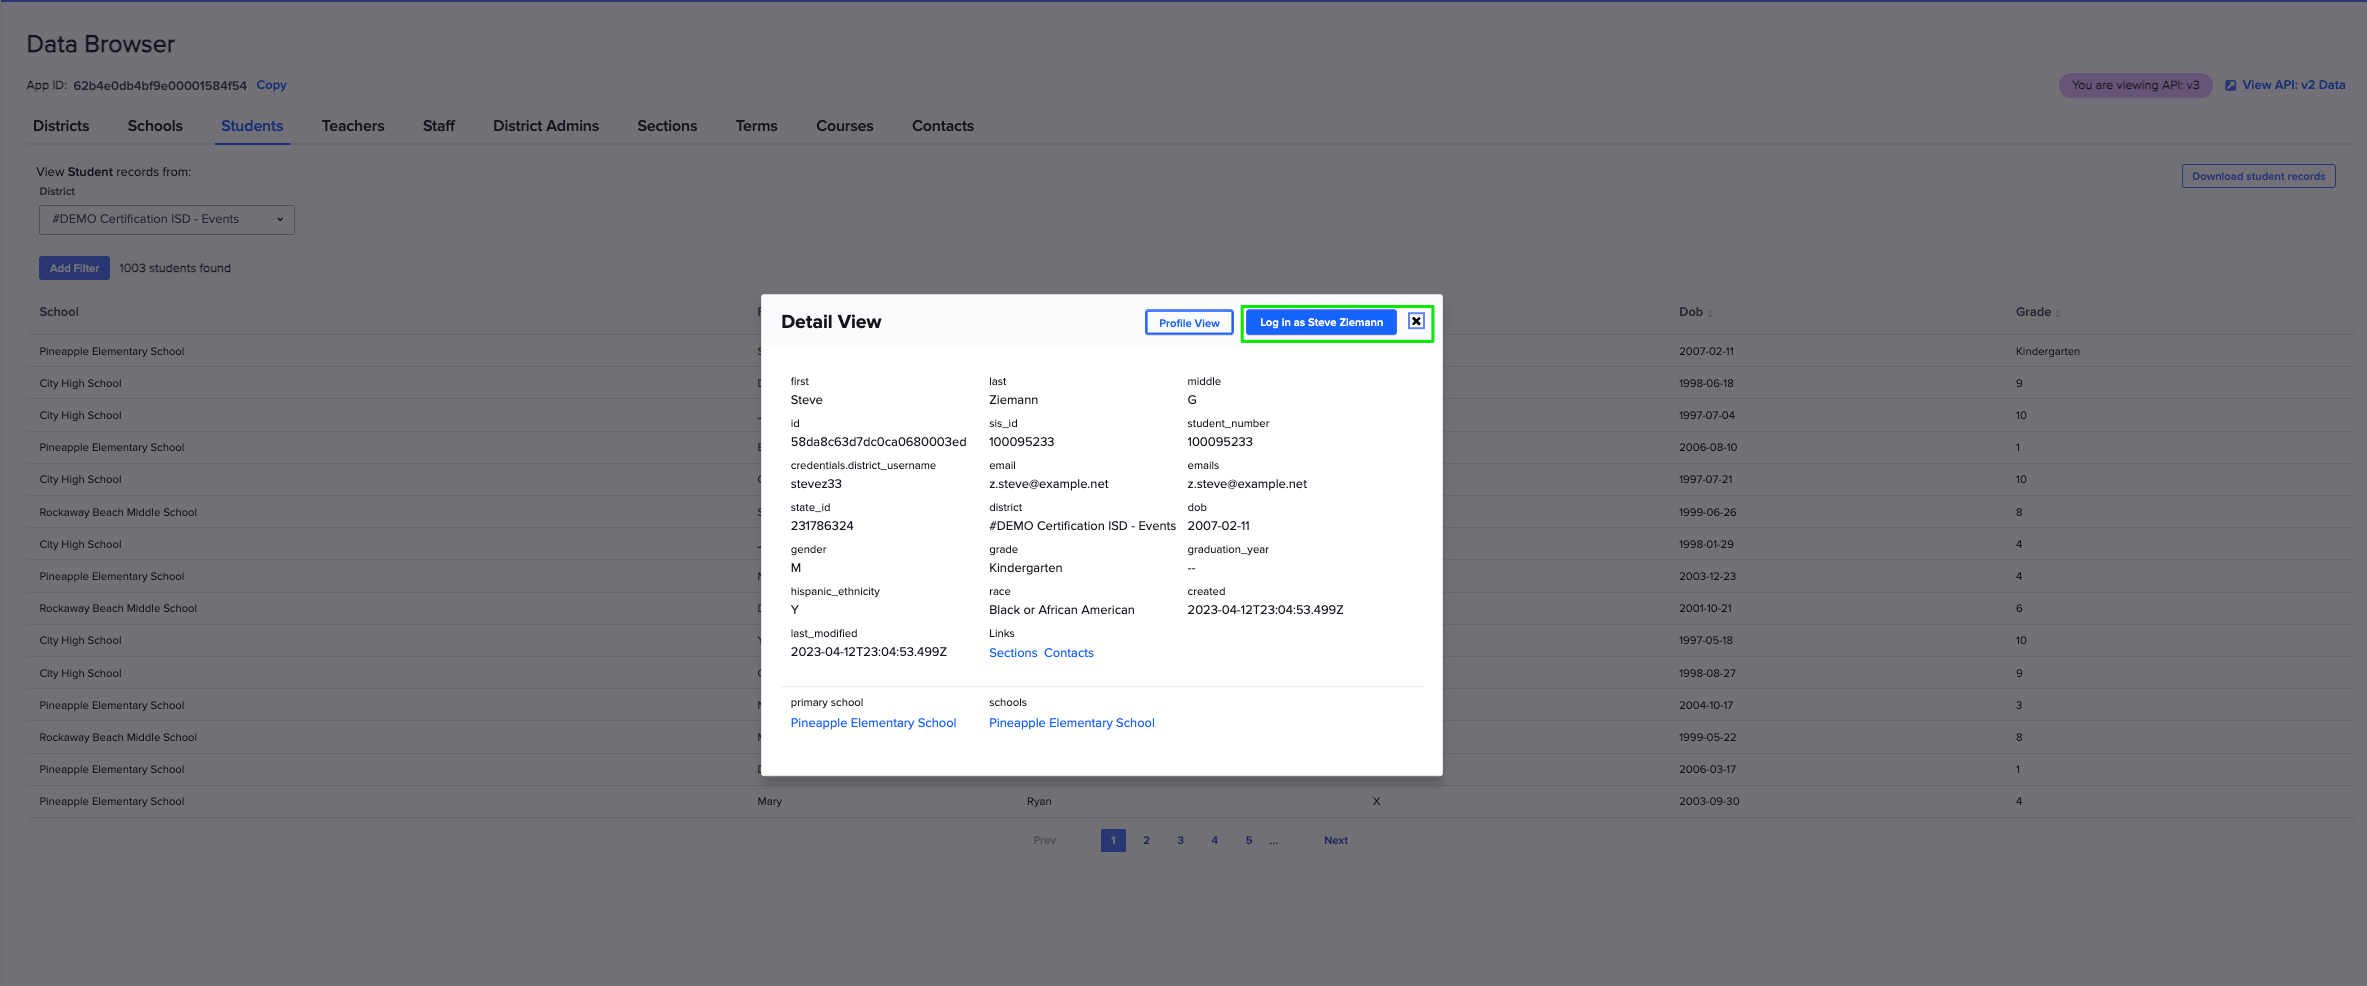
FOR CLEVER SECURE SYNC SUBSCRIBERS ONLY
You will have access to the Data Browser in your developer dashboard. From there, you can quickly test logins through the UI. -
Just click on a user's name in the Data Browser to pull up the "Detail View". In this view, you should find a "Log in as.." button in the top right corner of the pop-up modal.
Sandbox District
Default Sandbox District
Your developer account comes with an auto-generated sandbox district. By default, you will not have access to manage this sandbox district. While not required to actually test your integration, we can provide access to this sandbox district. All we'll need is an email address that is not yet associated with a Clever account. Once you have access, you can manage your sandbox district and test out the end-user experience of Clever using the following documentation:
User impersonation: https://support.clever.com/hc/s/articles/360000406146
Data browser: https://support.clever.com/hc/s/articles/202483068
Custom data: https://support.clever.com/hc/s/articles/360035757332
Uploading data: https://support.clever.com/hc/s/articles/202494408
The data set used for your default sandbox district can be downloaded here .
Custom Sandbox District
We only create custom sandboxes for Clever Secure Sync integrations. If you need to customize your test data, please refer to the documentation above.
Updated 2 months ago
Once you're done testing, you can prepare for certification on the next page.