

Testing Your SSO Integration
Test the Clever SSO portion of your SSO + Rostering integration before certification.
Clever Complete Agreement RequiredThis feature is included with a Clever Complete subscription. Sign up here or email your Application Success Manager to learn more.
SSO-only integrations are no longer supportedClever no longer supports new standalone SSO-only integrations. To implement district-managed Clever SSO, your application needs a Clever Complete agreement and should use SSO as part of an SSO + Rostering integration.
If you need access, contact your Application Success Manager or [email protected].
Use this page to test your Clever SSO integration before certification and make sure each supported login path works as expected.
Before you start
Before you begin testing, confirm these three things:
-
Which integration type are you testing?
Keep Clever Single Sign-On and Clever Library SSO separate while testing. The flows are similar, but the supported users, scopes, and certification expectations are different. -
Which test users should you use?
In most cases, you should use the default sandbox users associated with the integration type you are testing. -
Which scopes do you expect to have?
Data access changes depending on whether you are testing Clever Single Sign-On, Clever Library, or an account that also has Secure Sync access.
If you need a refresher on integration differences, see Clever Complete Integration Types and Quickstart Guides.
Required settings
Before you test, make sure these settings are configured in your developer dashboard:
Settings > Integration
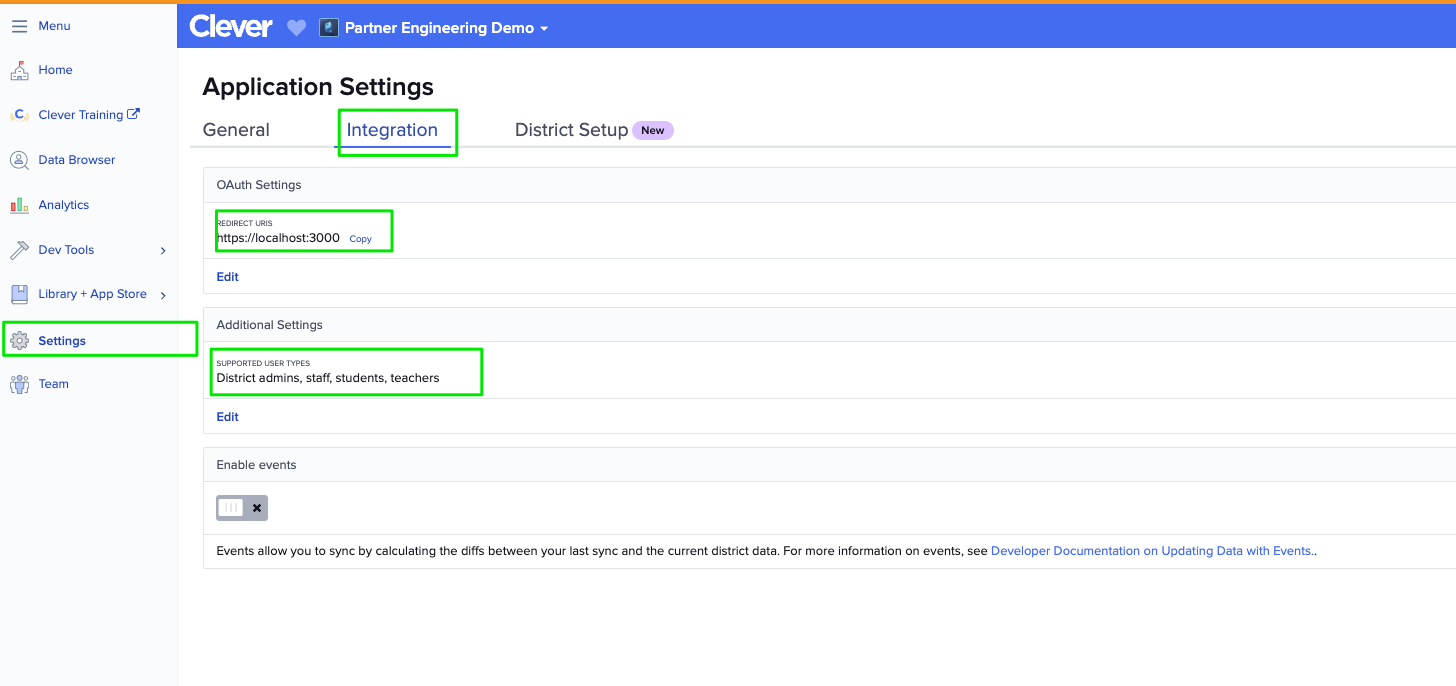
Supported user types
This setting controls which user types can use your SSO integration.
Clever Library only supports teachers and students.
Redirect URI
The redirect URI tells Clever where to return the authorization code or access token after a user authorizes your application.
This setting is an allowlist of redirect URIs that Clever accepts. If your authentication request uses a redirect URI that is not listed here, Clever returns an error.
If no redirect URI is specified in an authentication request, Clever uses the first redirect URI in the list.
Your default redirect URI must be publicly accessible for certificationIf your first redirect URI is not publicly accessible, Clever will not be able to certify your integration.
Test users and test plan
Your developer account includes default test users that you can use to validate SSO behavior.
Use the SSO Test PlanIf you want a faster path through the expected test cases, use the SSO Test Plan.
Pay close attention to which user type and integration type you are testing so you do not accidentally validate the wrong path.
Understand the SSO entry points
Users can start Clever SSO in multiple ways. Your testing should cover the entry points your integration supports.
For a broader overview, see Clever Single Sign-On - Overview.
If your integration requires a state parameter, review Best Practices & Edge Cases before testing Clever-initiated logins.
Support Clever Portal loginMost Clever users launch applications from the Clever Portal. Clever strongly recommends supporting Clever Portal login.
Log in with Clever on your own site is optional.
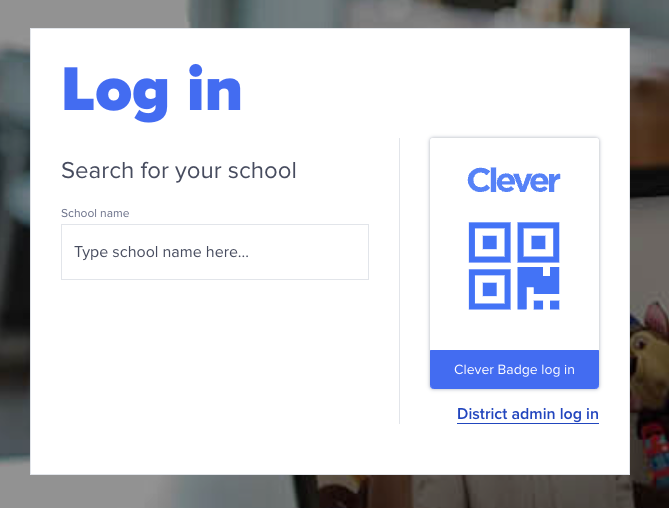
Pro tipIf your browser does not already have district context, you may see the Clever school picker.
You will not be able to find your sandbox district by searching for school names. Use your sandbox district ID instead.
To skip the school picker during testing, add
district_idto your authorization URL:https://clever.com/oauth/authorize?response_type=code&redirect_uri=&client_id=&district_id=
Testing is part of certificationIf you need a refresher on certification requirements, see Certification Overview.
Ways to test
SSO Test Plan
The SSO Test Plan is the recommended way to validate your integration before certification.
Default sandbox credentials commonly look like this:
- Student: username and password are the student’s
student_number - Teacher: username and password are the teacher’s
teacher_number - School admin: username and password are the school admin’s
staff_id
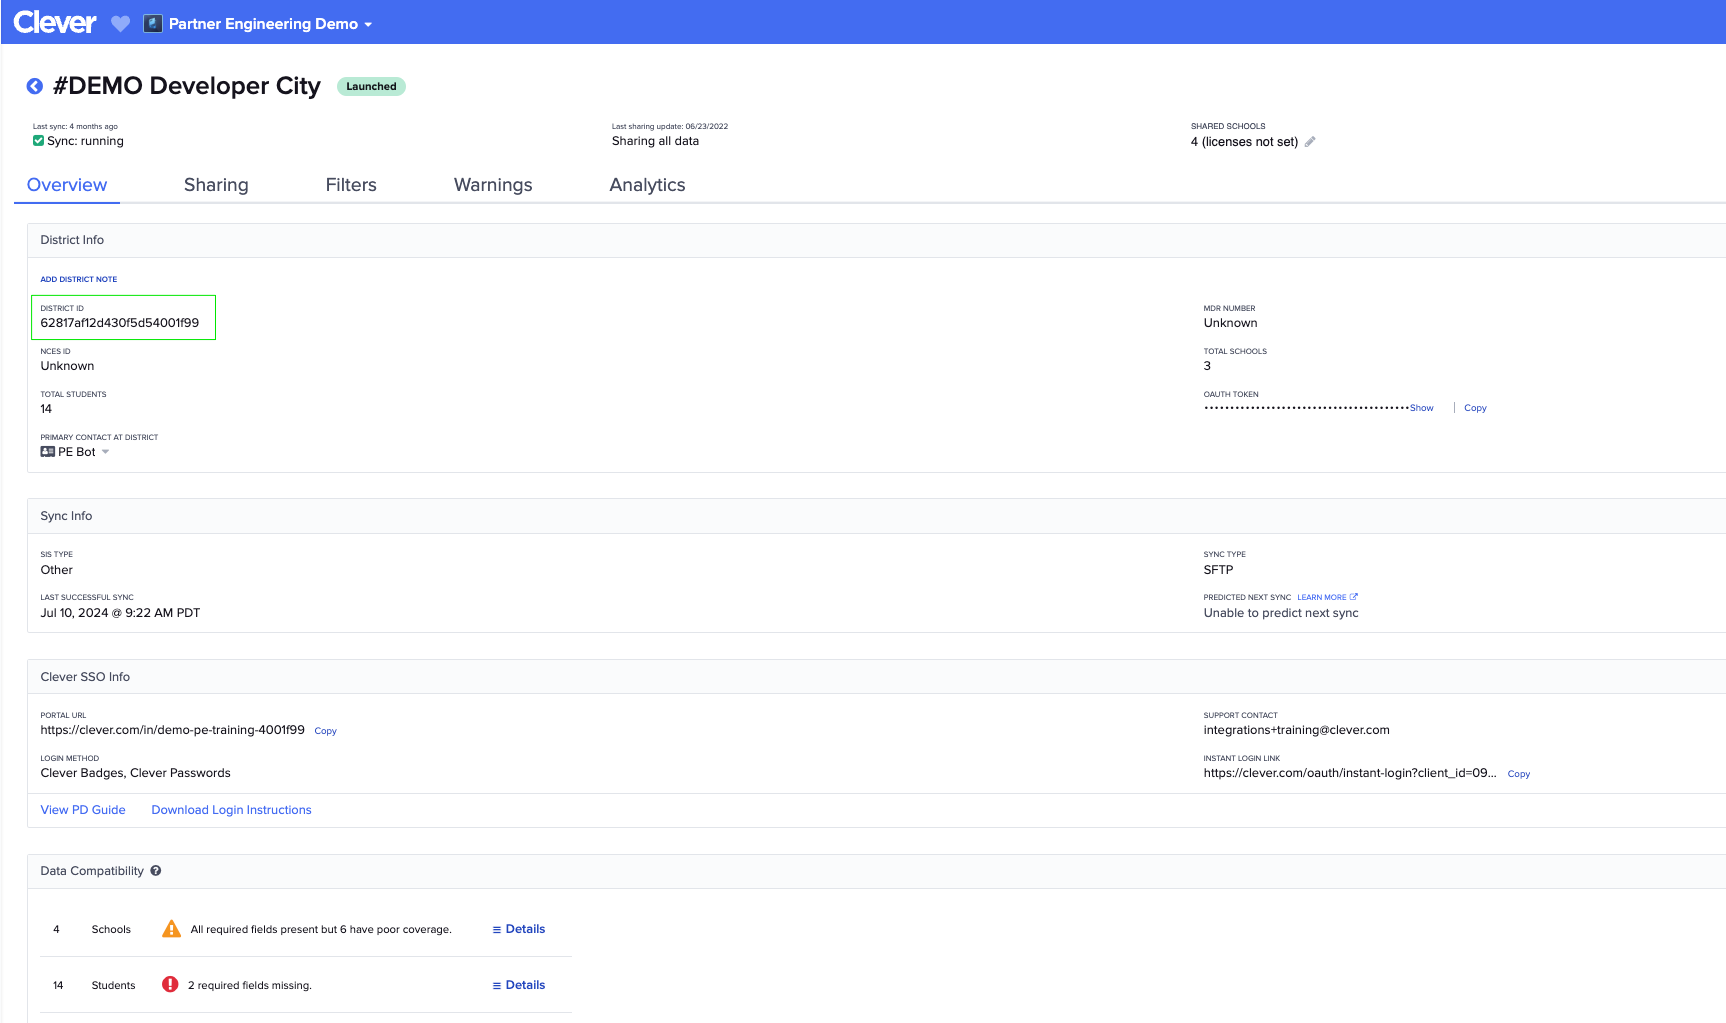
If you see the School Picker while testing and your browser does not have district context cached, use your sandbox district ID to locate the district.
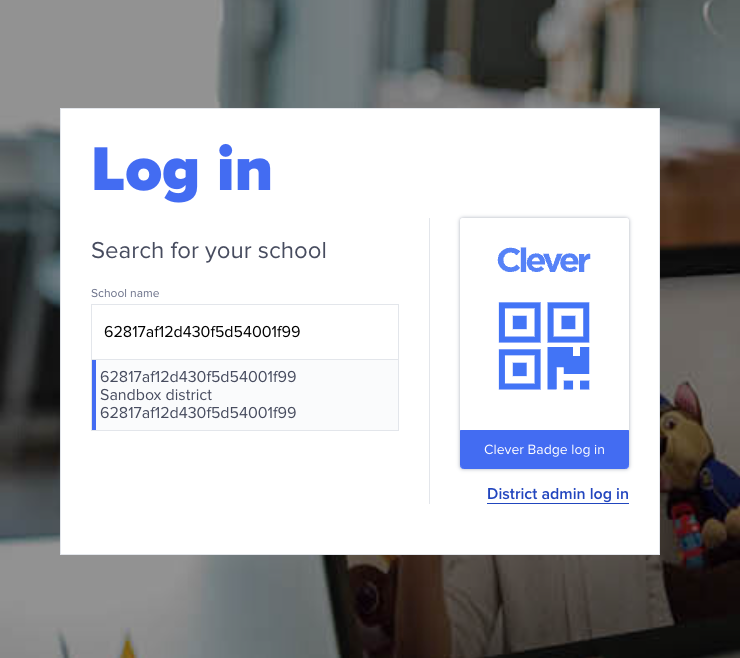
You can find your sandbox district ID in your dashboard.
Test native iOS callback handling
If you support a native iOS app, test the Safari-to-app handoff explicitly.
- Test on an iPhone or iPad with your native app installed.
- Test again on a device without your native app installed so the same flow stays in the browser.
- Confirm the installed-app case opens your native app already authenticated.
- Check your backend logs to confirm the same authorization code is not exchanged twice.
If you see two callback requests for the same code separated by a few seconds and the second fails with invalid_grant, your iOS implementation is likely processing the same callback in both Safari and the native app.
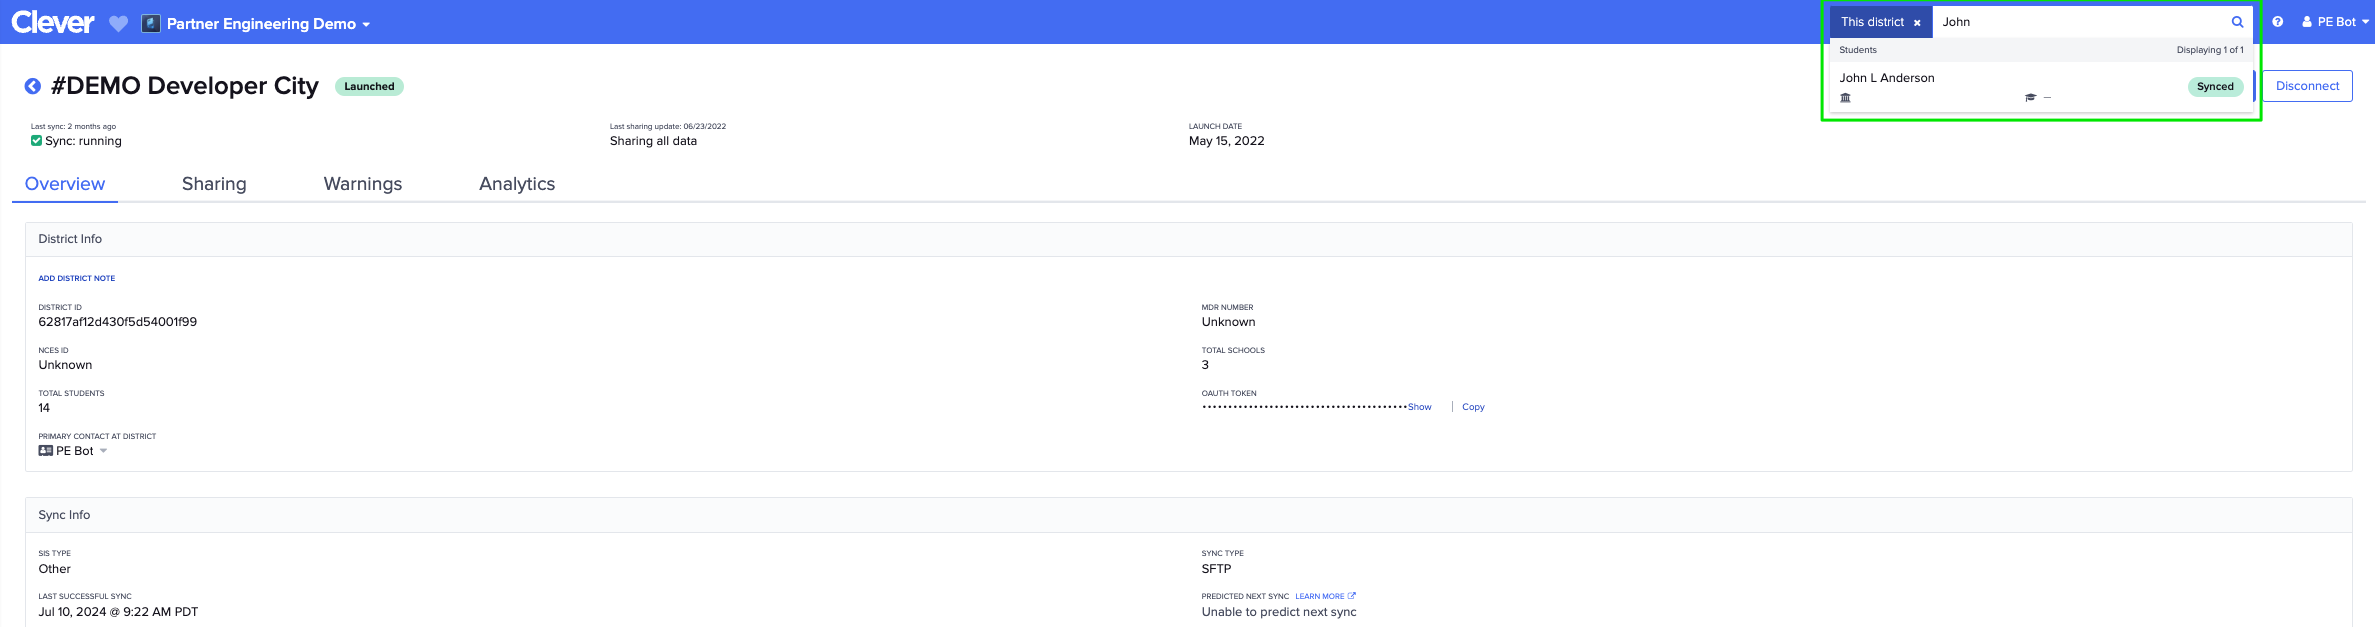
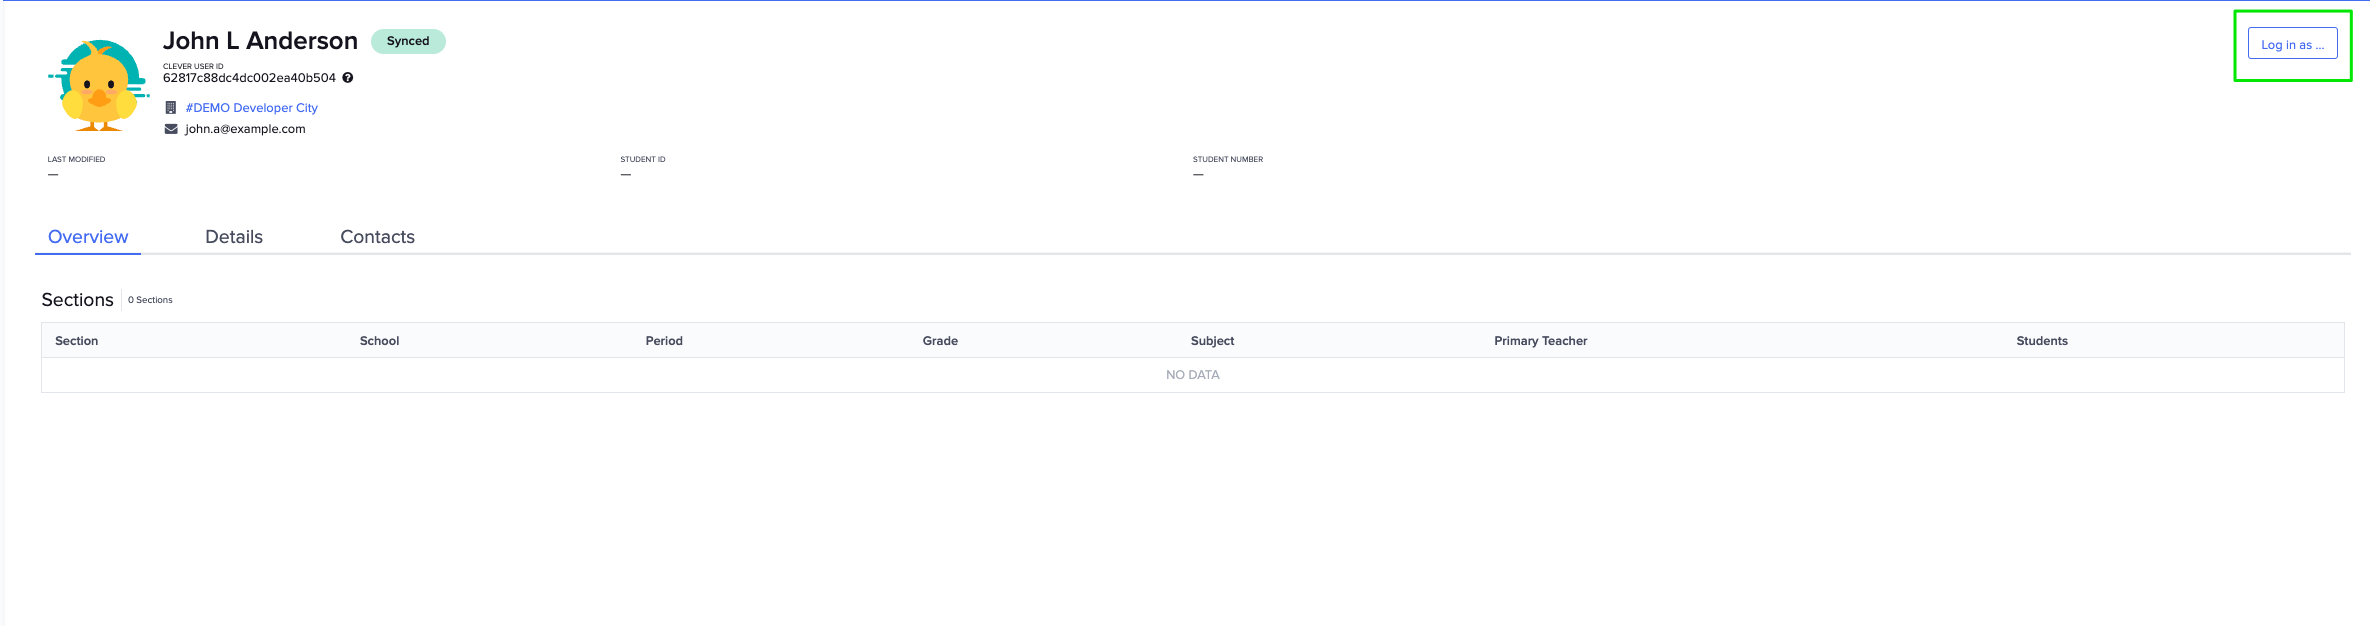
Developer dashboard shortcut
In a development account, you can type a test user’s name while viewing a district. After you select the user, the dashboard shows a Log in as... button in the top-right corner.
This shortcut only works in your developer account. It does not work in production if you do not have Clever Secure Sync access.
Impersonate your sandbox district admin
If you have access to your sandbox district, you can test the end-user experience by impersonating your sandbox district admin.
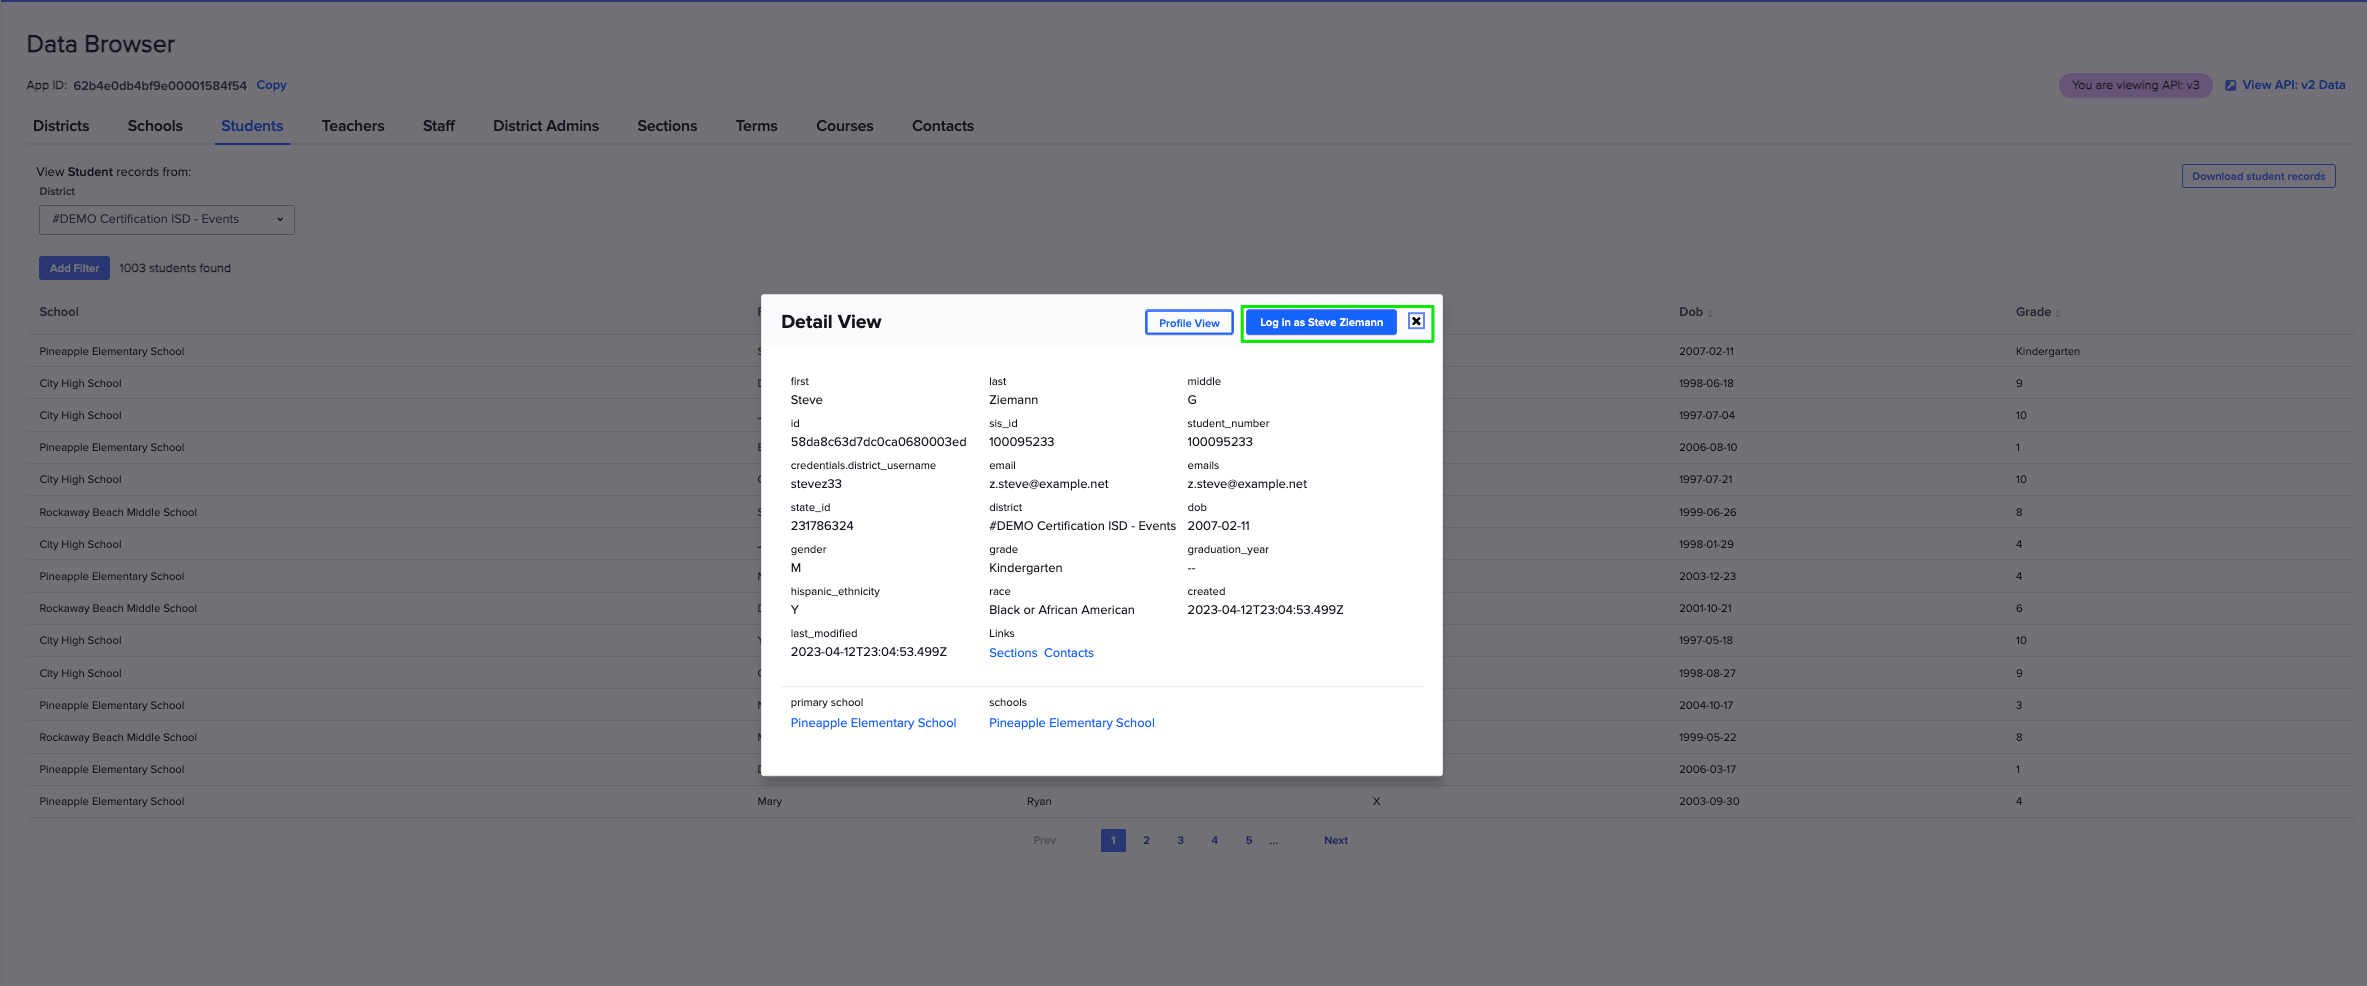
- For Clever Secure Sync subscribers only:
You can use the Data Browser in your developer dashboard to test logins through the UI. - Click a user’s name in the Data Browser to open the detail view.
- In that view, use the Log in as... button in the top-right corner.
Sandbox district
Default sandbox district
Your developer account includes an auto-generated sandbox district.
By default, you do not have access to manage this sandbox district. Managing it is not required to test your integration, but Clever can provide access if needed.
To request access, provide an email address that is not already associated with a Clever account.
Once access is enabled, you can use the following resources to manage the sandbox district and test the Clever end-user experience:
- User impersonation: https://support.clever.com/hc/s/articles/360000406146
- Data browser: https://support.clever.com/hc/s/articles/202483068
- Custom data: https://support.clever.com/hc/s/articles/360035757332
- Uploading data: https://support.clever.com/hc/s/articles/202494408
You can download the default sandbox dataset here.
Custom sandbox district
Clever only creates custom sandbox districts for Clever Secure Sync integrations.
If you need to customize your test data, use the sandbox management resources listed above.
Updated about 2 months ago
What’s Next
Once you've finished reading this page, check out integration type-specific instructions for testing.