Clever Library - Authorization
This page will briefly describe the unique authorization flow for the Library integration.
Clever Library applications are authorized by teachers as opposed to by districts as with the District SSO and Secure Sync integrations.
Sign-Up/Installation
To connect with your application, a teacher will either click "Sign up with Clever" on your application website or they'll find your listing in the Library and click "Install".
Authorization
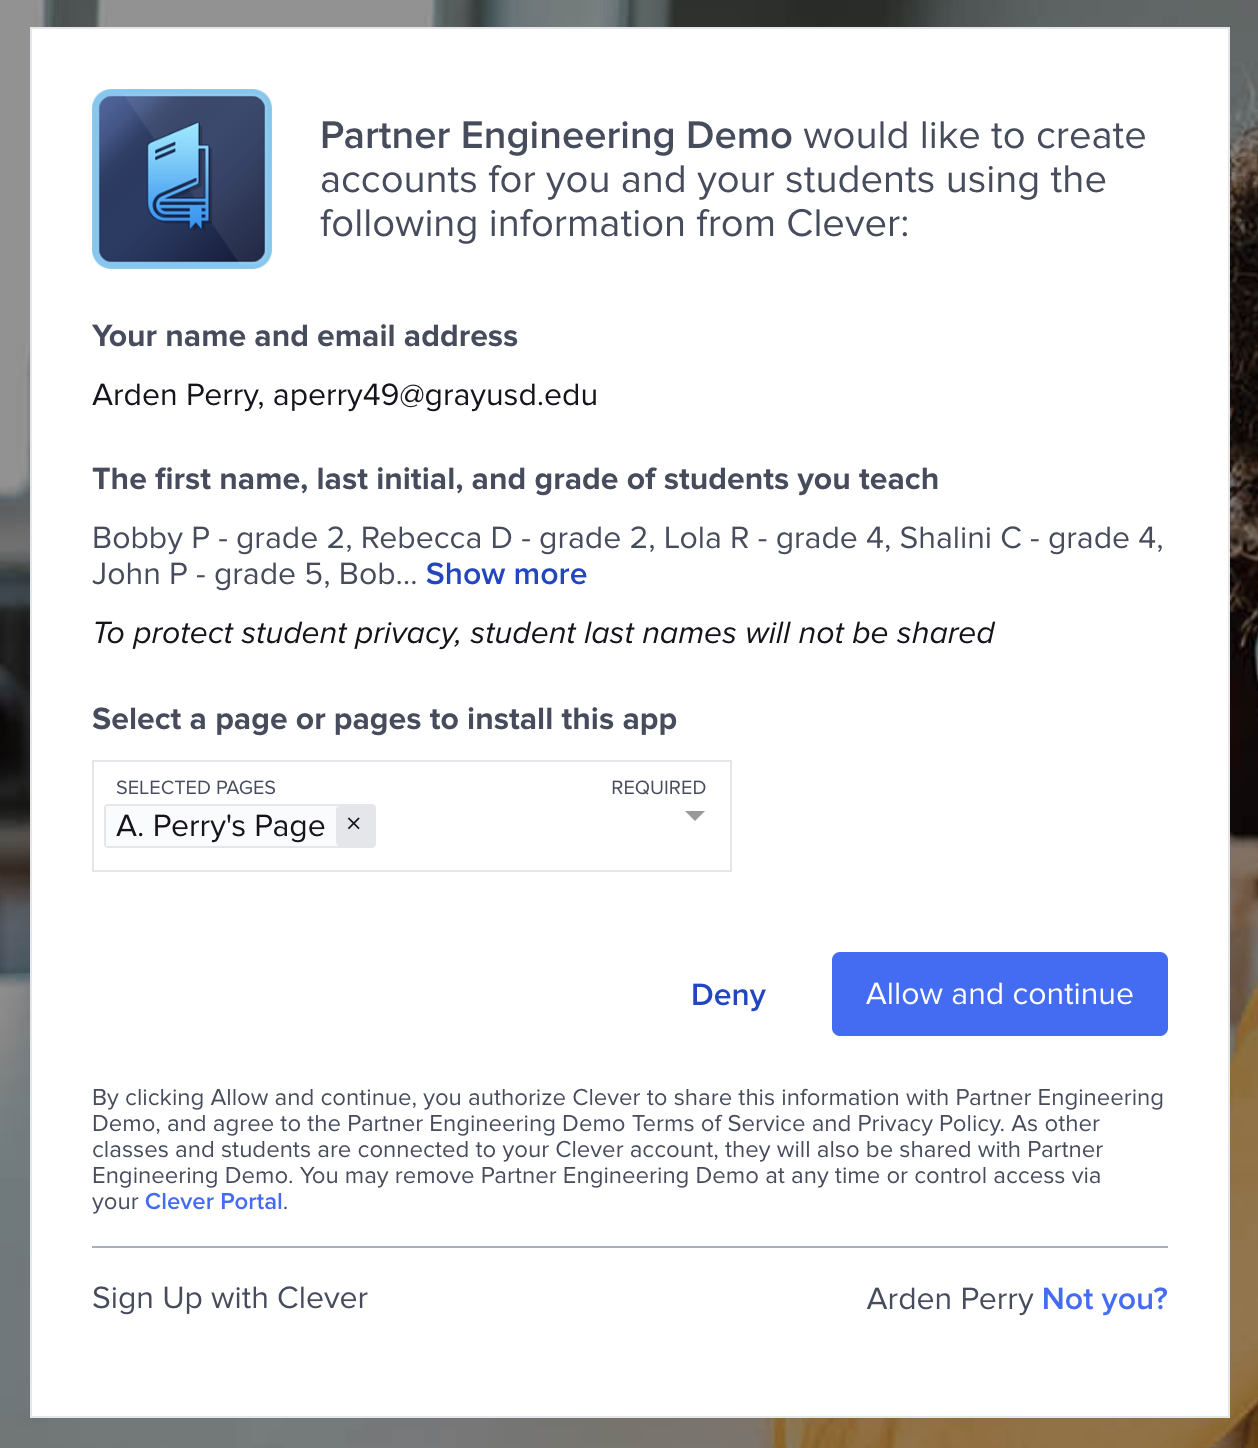
Next, the teacher should see an authorization screen asking them to authorize the sharing of the sections they teach. See the screenshot below. Please note that the teacher is limited in their authority to share certain student information.
Upon authorization, Clever will proceed to initiate the authentication process by granting an authorization code. More on this can be found in the OAuth and OIDC documentation.

A Library integration authorization screen, as would be seen by a teacher connecting to a Library application for the first time.
Teacher Pages
If you're curious about the "pages" mentioned in the screenshot above, see this article. However, it is not particularly relevant to this discussion.
District Authorization vs Teacher Authorization
Context is important!
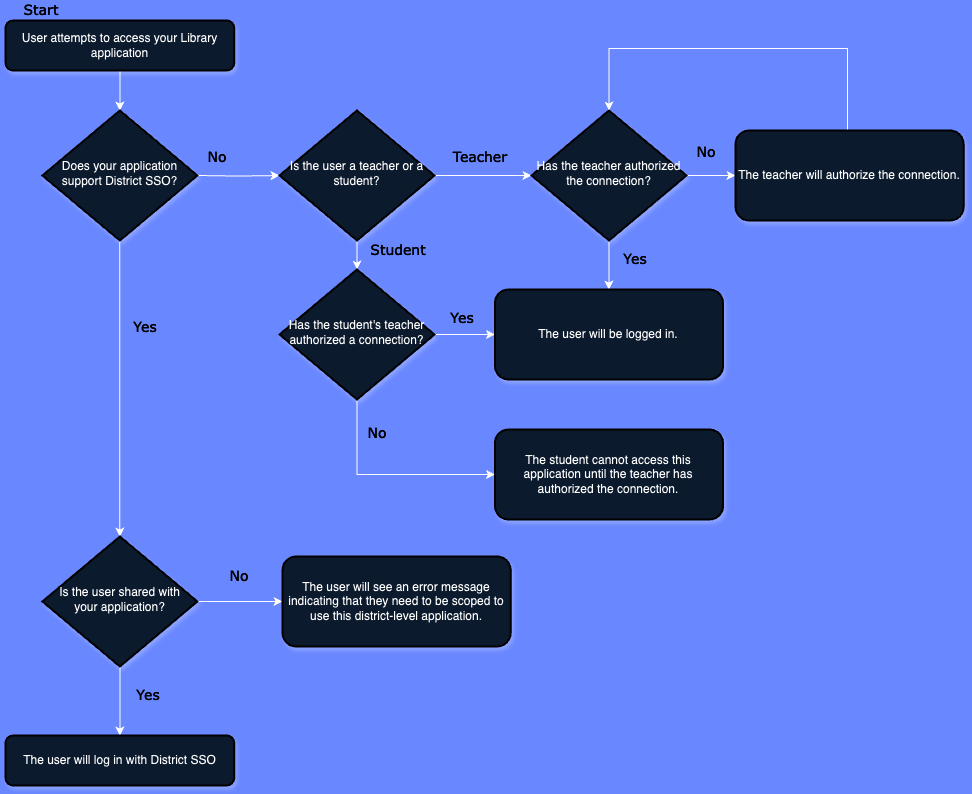
In general, district authorization takes precedence over teacher authorization. A Library connection can only be established with a user if your application is not connected to that user's district. If your application supports both a district-level integration as well as the Library one, you may need to consider the flowchart below.

This flow chart depicts the logic associated with determining if a login will be Library or District SSO.
To identify teacher-authorized SSO requests, be sure to look out for the "authorized_by"field at the /me endpoint during SSO. A district SSO integration would show the value "district" instead of "teacher".
{
    "type": "user",
    "data": {
        "id": "****",
        "type": "user",
        "authorized_by": "teacher"
    },
    "links": [
        {
            "rel": "self",
            "uri": "/me"
        },
        {
            "rel": "canonical",
            "uri": "/v3.0/users/****"
        }
    ]
}
Updated over 1 year ago
