Clever LMS Connect - Gradebook Sync Beginner's Guide
This page offers a guide of the LMS Connect gradebook sync API, detailing its functionality and capabilities.
For Demo Purposes Only
To access LMS Connect with your own client credentials, a valid subscription is required. This guide demonstrates how to use LMS Connect in a sandbox environment with test credentials, allowing you to explore its functionality before purchasing a plan. If you're interested in accessing full functionality, please reach out to [email protected]
Pre-Requisites
You will not be able to complete this guide without having met the requirements below. Please take the time to read through each resource before you proceed.
- Access to Clever's Postman Collection.
- Follow this guide: Exploring the Clever API.
- Baseline understanding of LMS Connect.
Getting Started
In this guide, we're going to be using the LMS Connect API to explore the gradebook sync integration for the LMSs listed below:
- Google Classroom
- Canvas
- Schoology.
Let's get familiarized with the LMS Connect Postman Collection. Go ahead and click through the folders and requests. Notice that there is a folder of identical requests for each LMS. They are labeled to help you differentiate between different LMS environments as you explore this product.
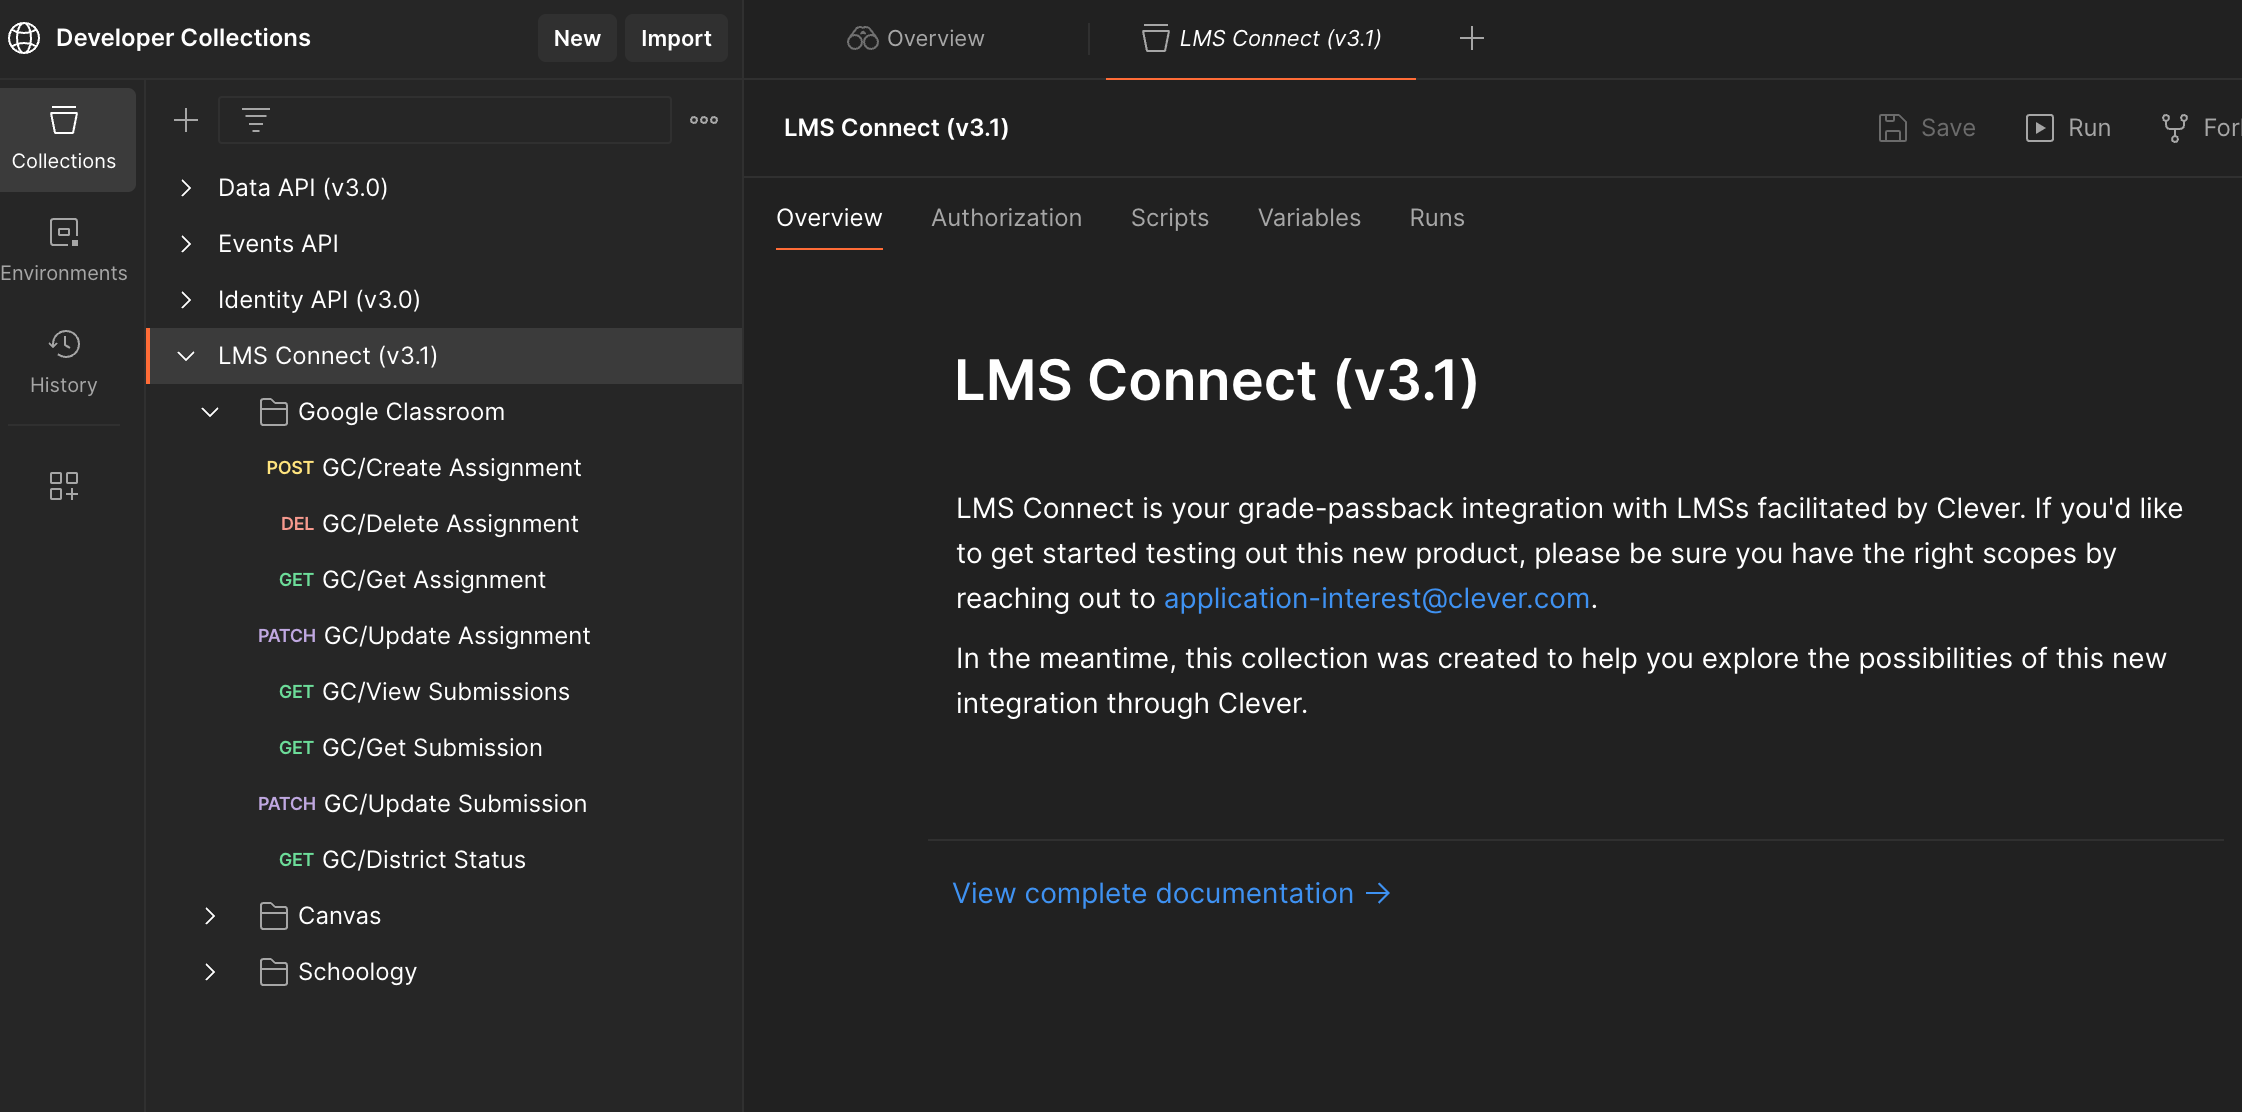
Click into Environments > LMS Connect Demo. You will find a set of LMS Connect-related variables. Please note that for the purposes of this guide, you should not need to edit any of these variables.
Testing it Out
Creating an Assignment
We're going to get started by creating an assignment in Google Classroom. If you are more interested in trying this out with Schoology or Canvas, the steps for creating and managing assignments and submissions will be the same. There will be a component of this activity where you will be checking your work in the actual LMS. You will find the necessary details for each LMS in the relevant sections at the bottom of the page.
Click into the POST GC/Create Assignment Request of the Google Classroom folder. Make sure that you have the Environment set to "Development" in the top right corner. The authorization should already be set in the parent folder. This bearer token is provided by Clever for demo purposes only.
Notice that there is an example request body already included in the "Body" tab of the request.
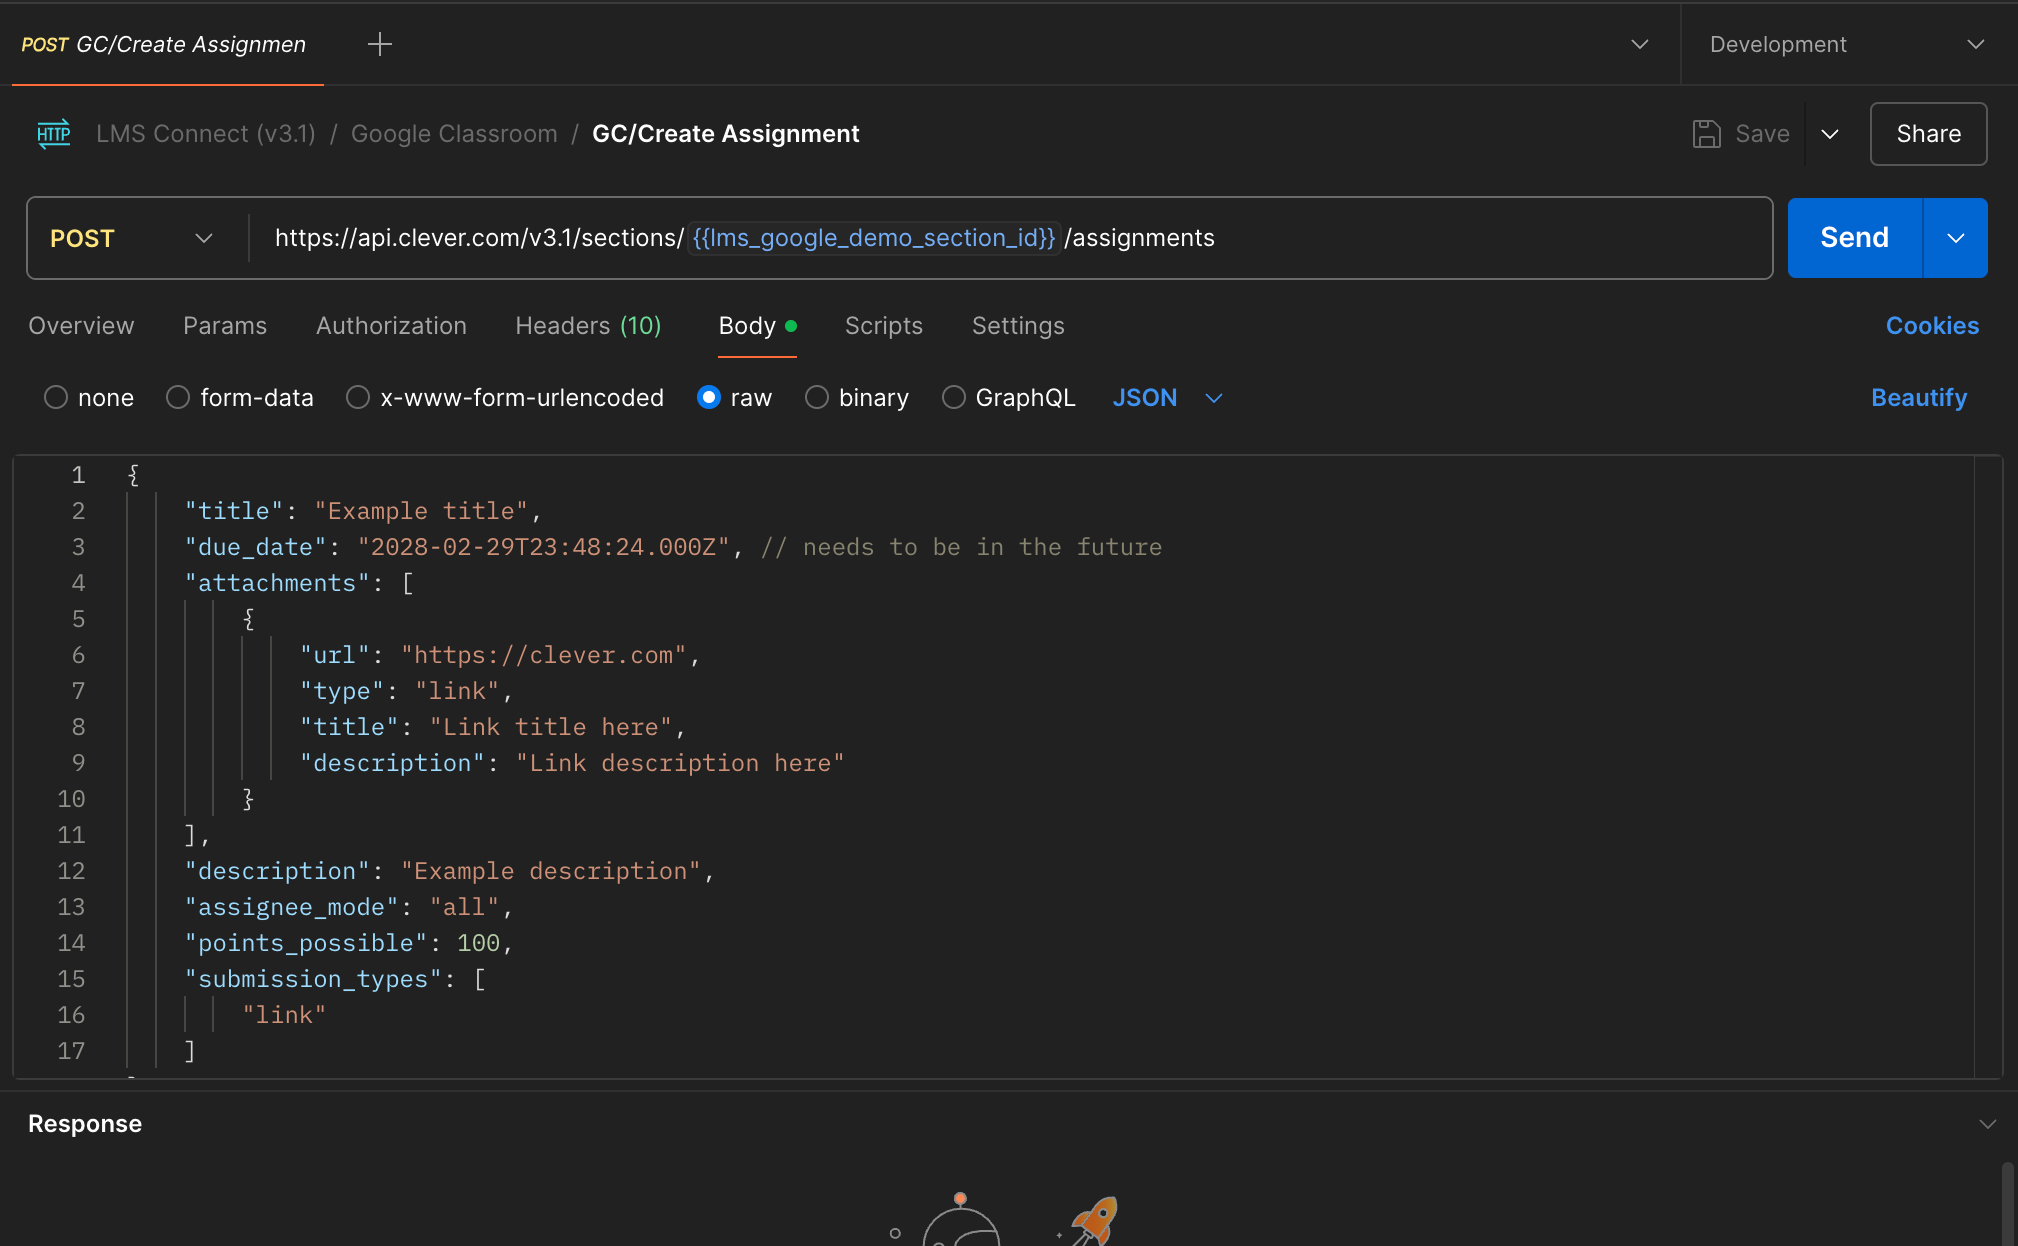
Use the data model to adjust this request body however you'd like. Try editing the "title" field to something memorable. You will use this value to confirm the creation of your assignment later. When you are ready, click "Send".
You should receive a status 200 and a response body as seen below. Be sure to save the "id" value somewhere for safekeeping. You will need it later for other tasks. If you lose it, there is currently no way to view all assignments so you will just have to generate a new assignment to move on.
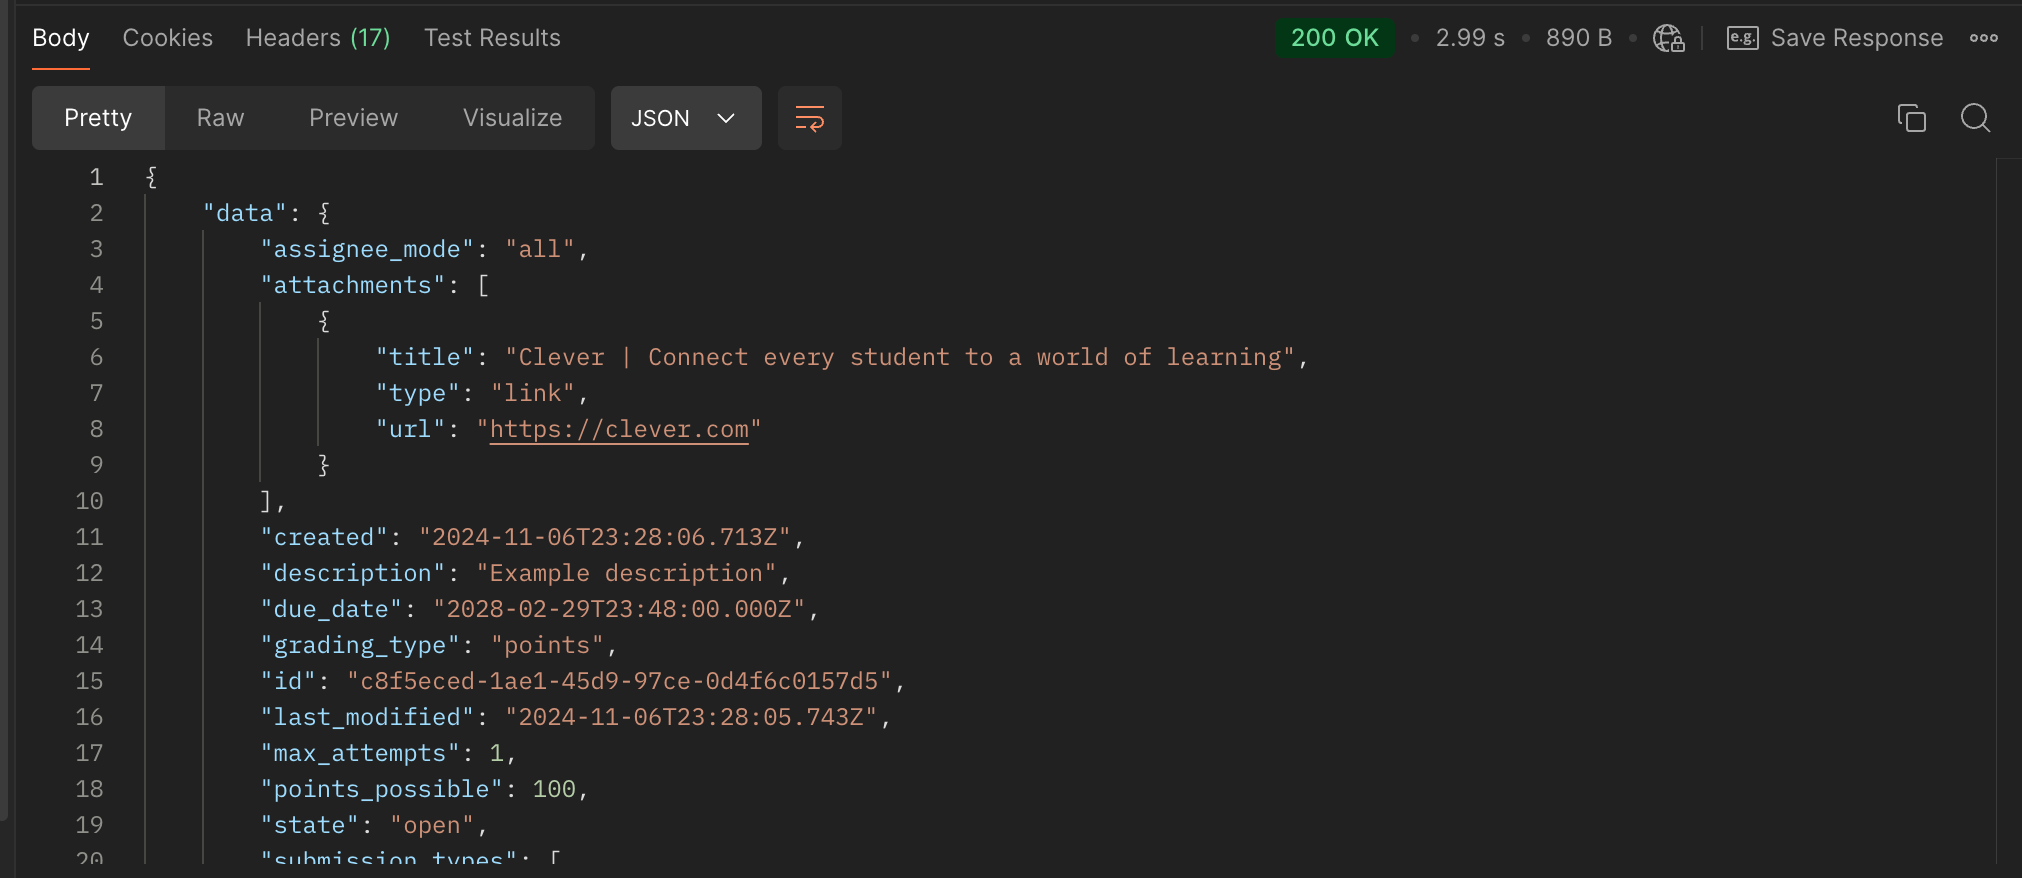
Be sure to refer to this section to check your work.
We've now created an assignment for a specific section in Clever and passed it along to Google Classroom. All students enrolled in that section will have a submission record associated with this assignment. We will explore submissions in a later step.
Editing an Assignment
Now that we've created an assignment, what if there are things we want to change? For example, let's say we want to update the assignment "title", the "due date", and the "points_possible" value?
Click into PATCH GC/Update Assignment. The request body should already be pre-populated with an update to the "due_date" value. Let's add some more updates.
{
  "title": "Second Title",
  "due_date": "2032-02-29T23:48:24.000Z",
  "points_possible": 50
}
In the request URL, take your assignment ID from the last step and assign it to the temp_assignment_id variable by hovering over it and pasting the value.

When you are ready, click "Send". You should receive a status 200 as well as a response body including the updated record. Back in Google Classroom, you should see the updates as well.
Viewing Submissions
In this step, we're going to take a look at submissions. As mentioned before, each student enrolled in a section will have a submission record auto-generated when the assignment is created. We can see this in action by clicking into the GET GC/View Submissions request.
Ensure the temp_assignment_id variable is populated and click "Send".
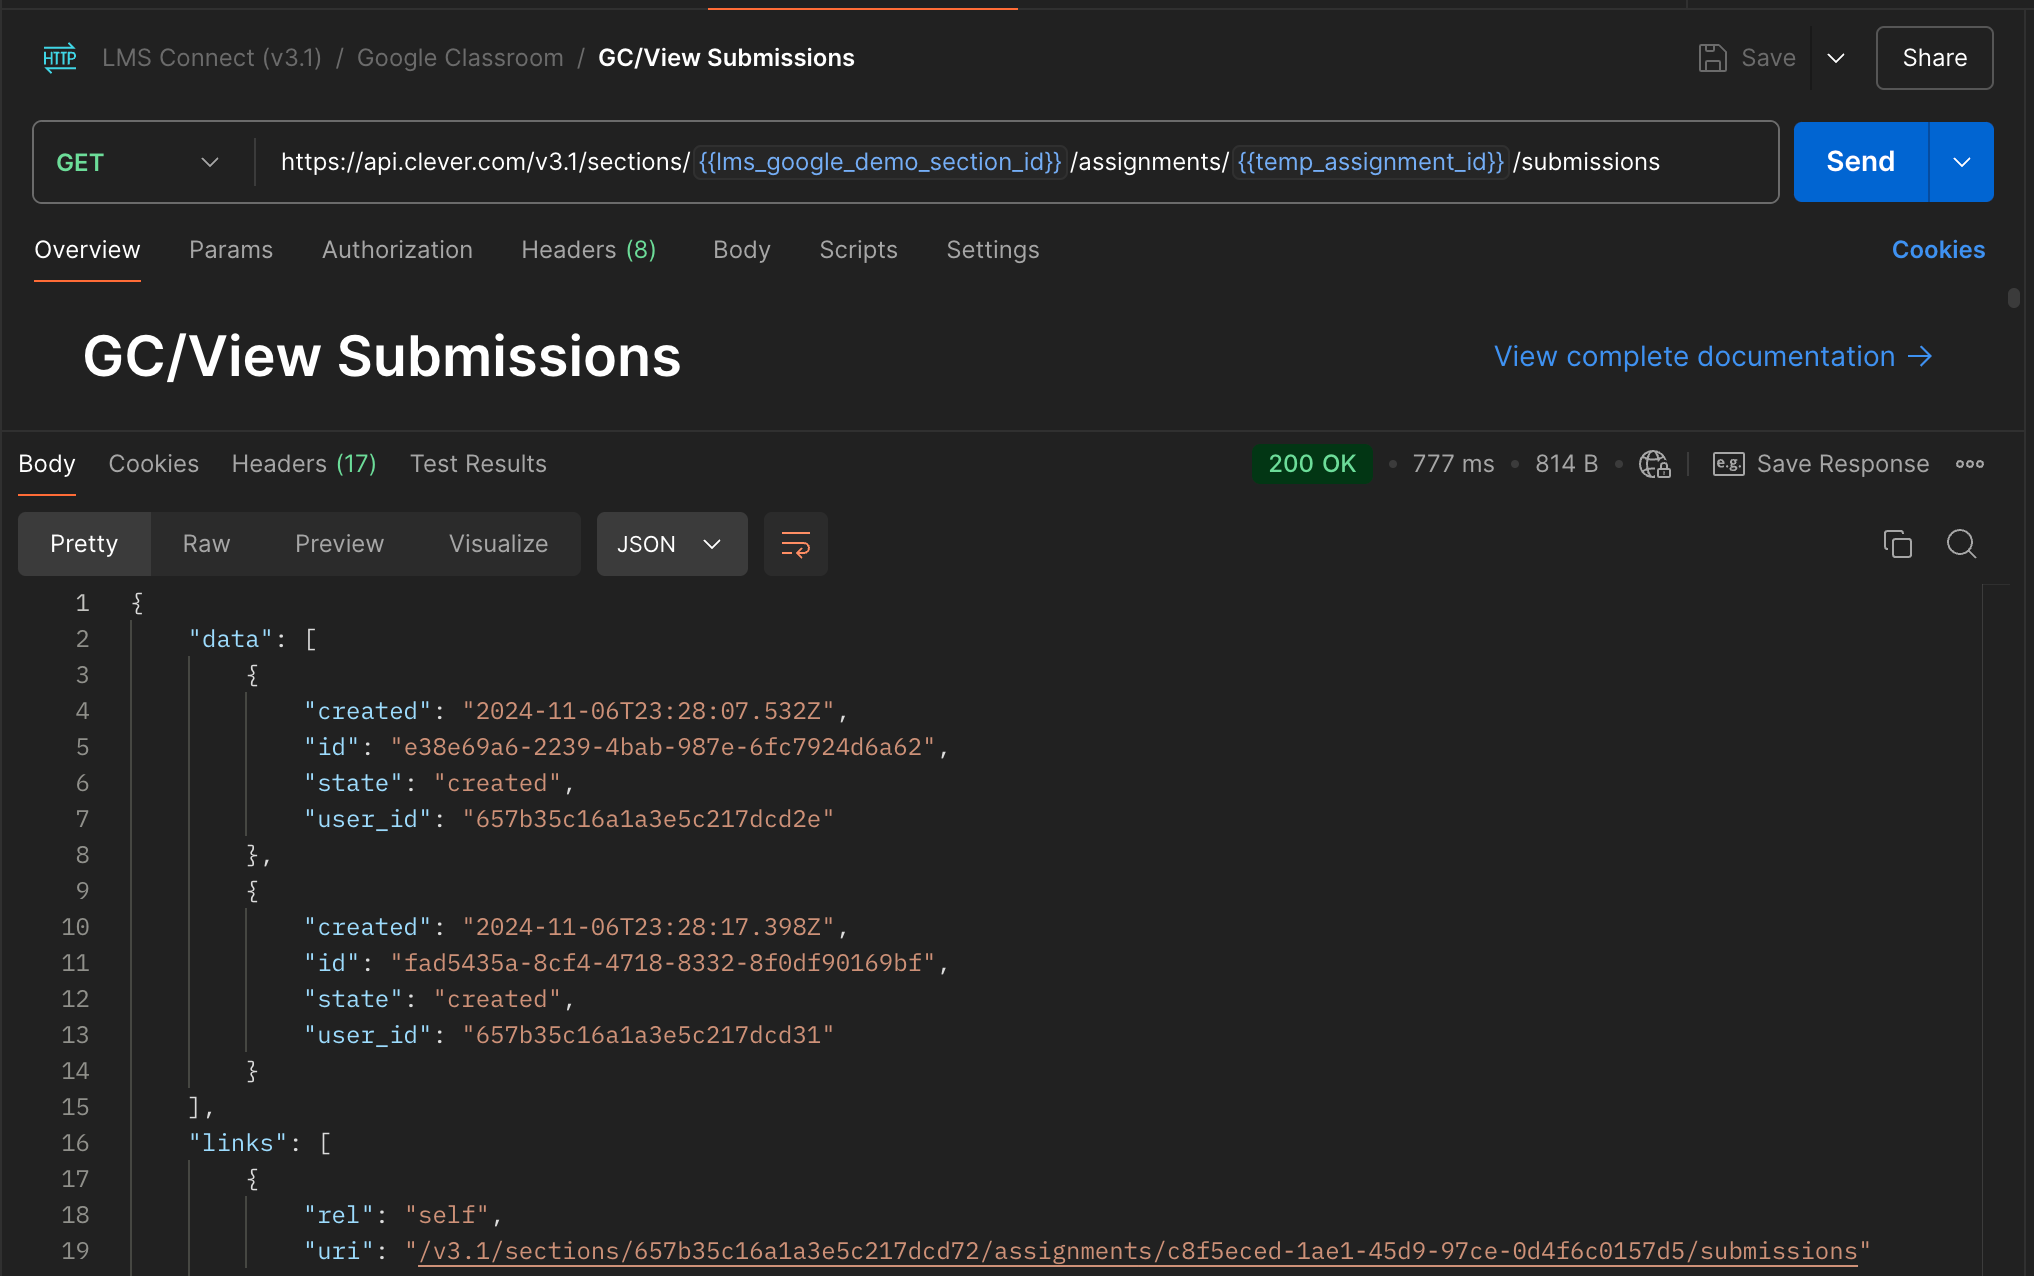
You should receive a status 200 as well as a response body containing a record for each student where the user_id represents the student and the id represents their submission ID. You will always refer to submissions via the user_id, as we'll see in the next step.
Updating a Submission
Next, we want to edit the submission state and assign a grade. Click into the PATCH GC/Update Submission request. The request body should be pre-populated for you. Feel free to explore the data model for other options.
{
    "state": "submitted",
    "grade_comment": "test",
    "grade_points": 80,
    "grade": "B"
}
Ensure the temp_assignment_id variable is populated and click "Send".
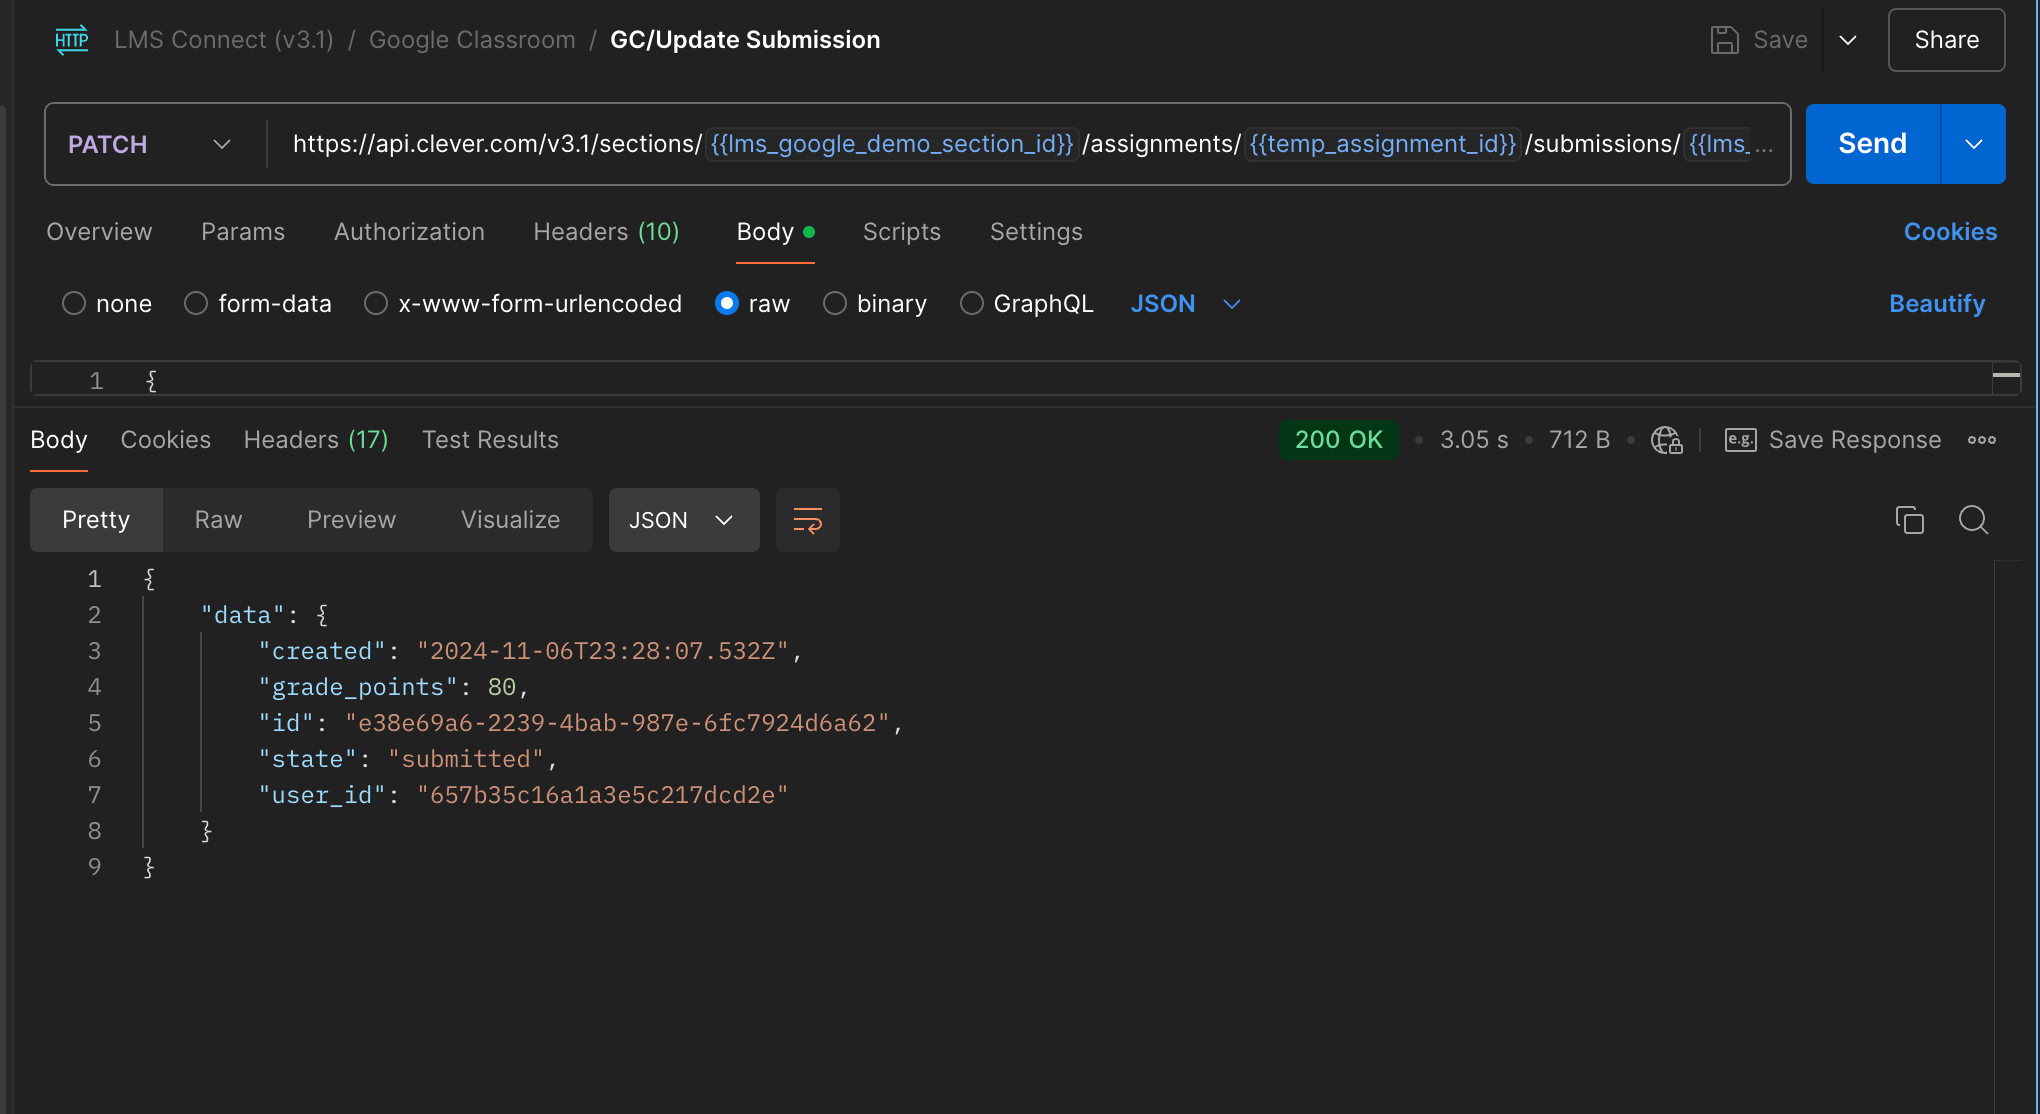
You should receive a status 200 as well as a response body containing the submission information. Back in Google Classroom, you should see an updated submission score for one of the students.
Deleting an Assignment
Lastly, we're going to delete the assignment you created to leave the demo environment in a nice, clean state for future use. Click into the DEL GC/Delete Assignment request.
Ensure the temp_assignment_id variable is populated and click "Send".
You should receive a 200 status. You can confirm that the assignment has been deleted in Google Classroom.
Checking Your Work
Google Classroom
Teacher
You can confirm the creation of your assignment by logging in to Google Classroom as the demo teacher.
- Navigate to classroom.google.com.
- Click Sign In > Google Classroom
- email: [email protected]
- password: clever_demo!
- Click into the section named "Grade 1 Science, Class 103 - Prosacco - 4".
- You should be able to see your assignment on this page.
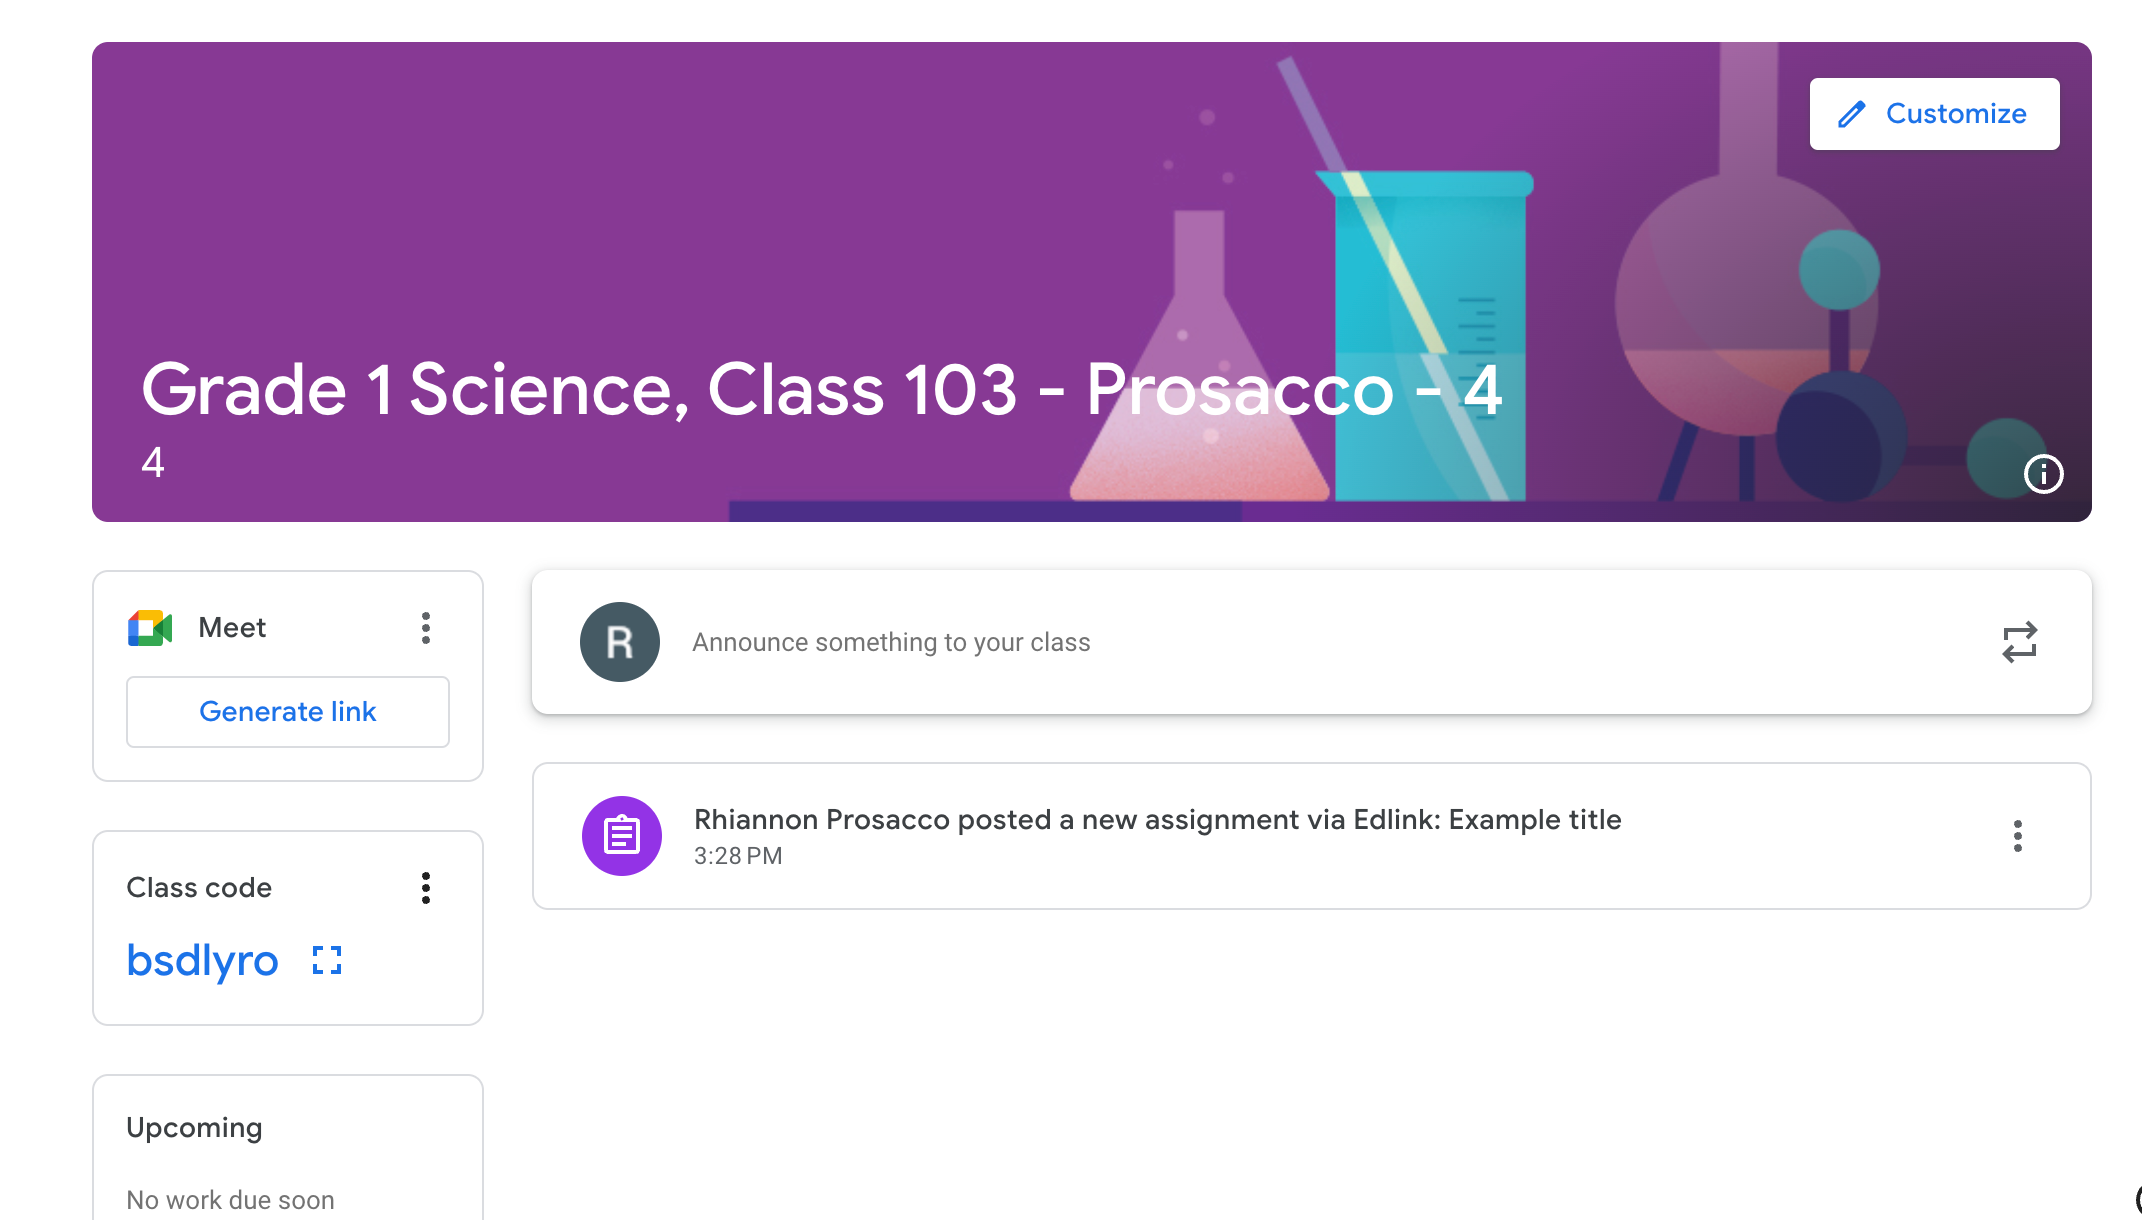
Section: Grade 1 Science, Class 103 - Prosacco - 4 from the teacher view
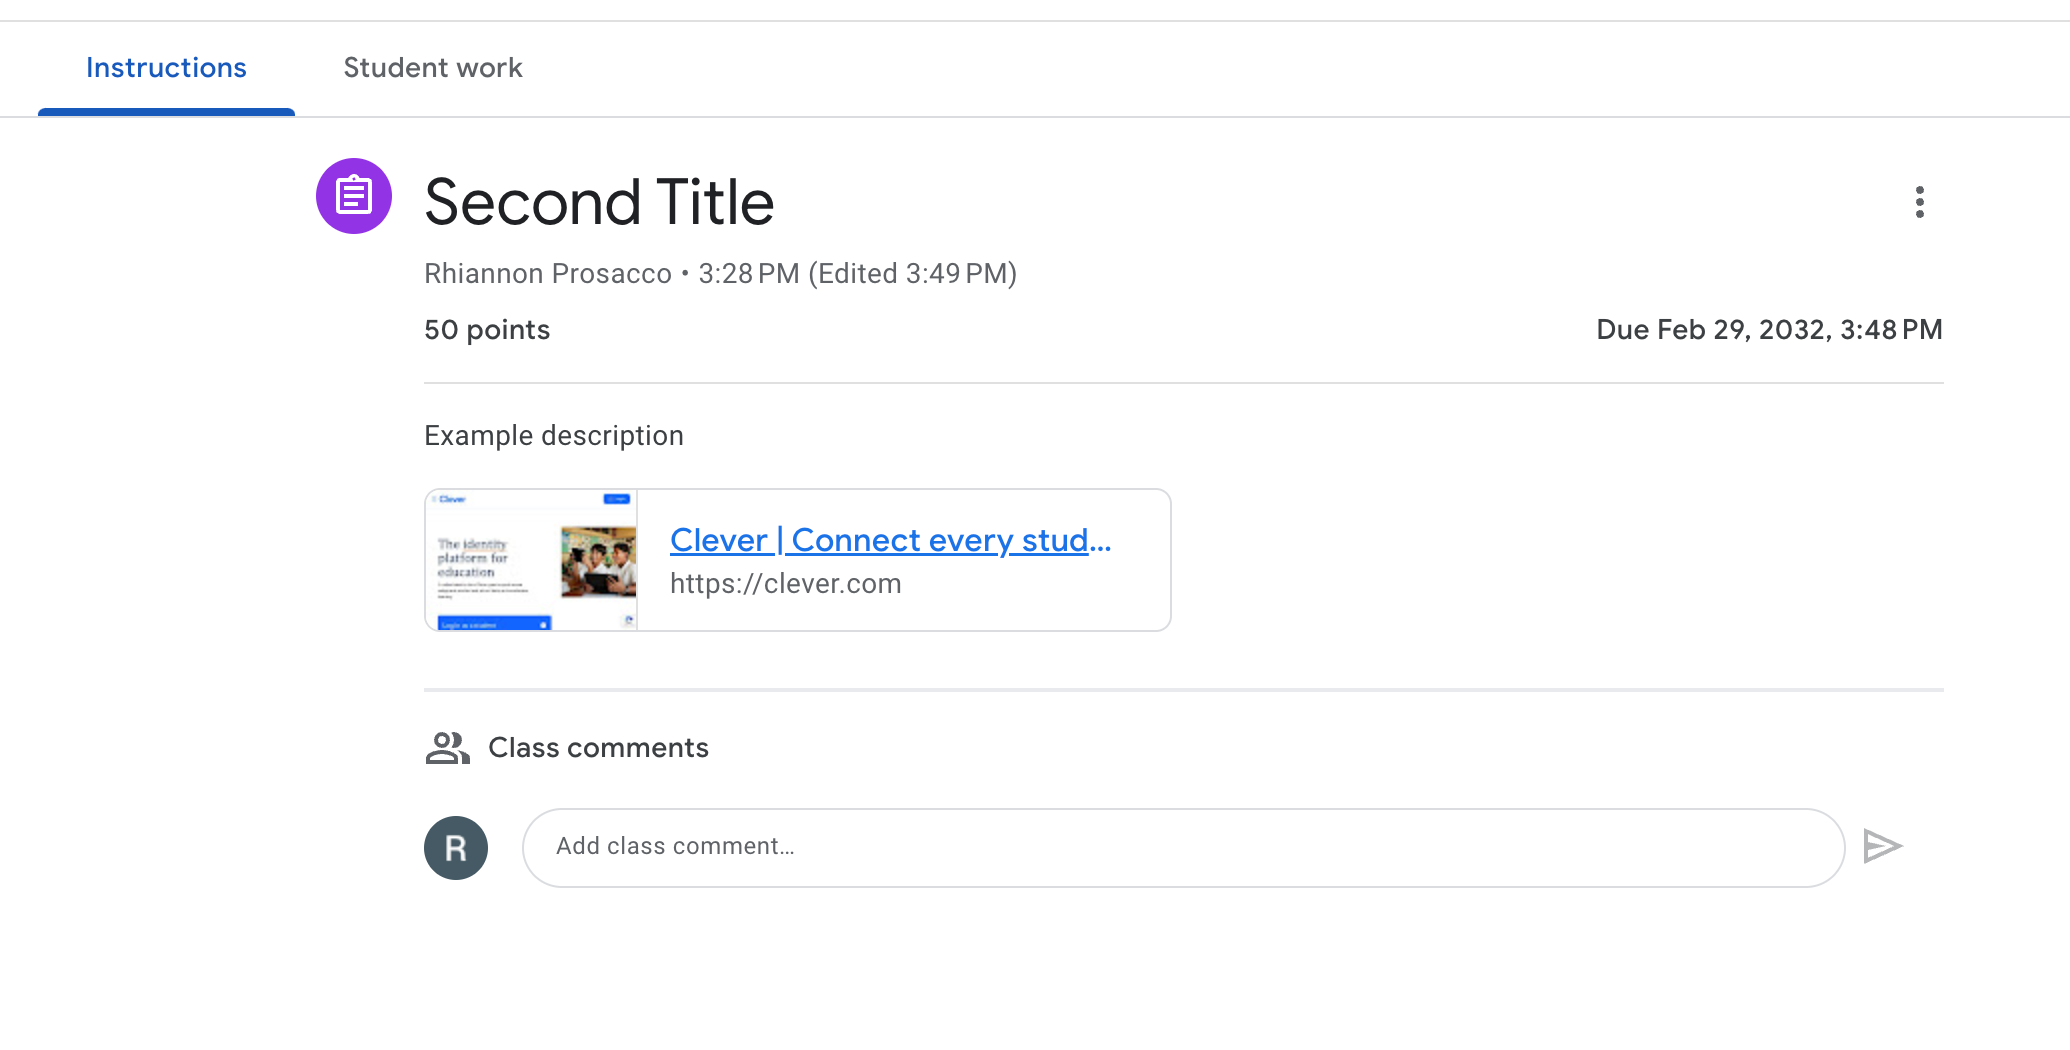
After updating the assignment from the teacher view
Student
Once you've created a submission, you can also take a look from the student perspective.
- Navigate to classroom.google.com.
- Sign In
- email: [email protected]
- password: clever_demo
- Click into the section named "Grade 1 Science, Class 103 - Prosacco - 4".
- You should be able to see the student submission and score.
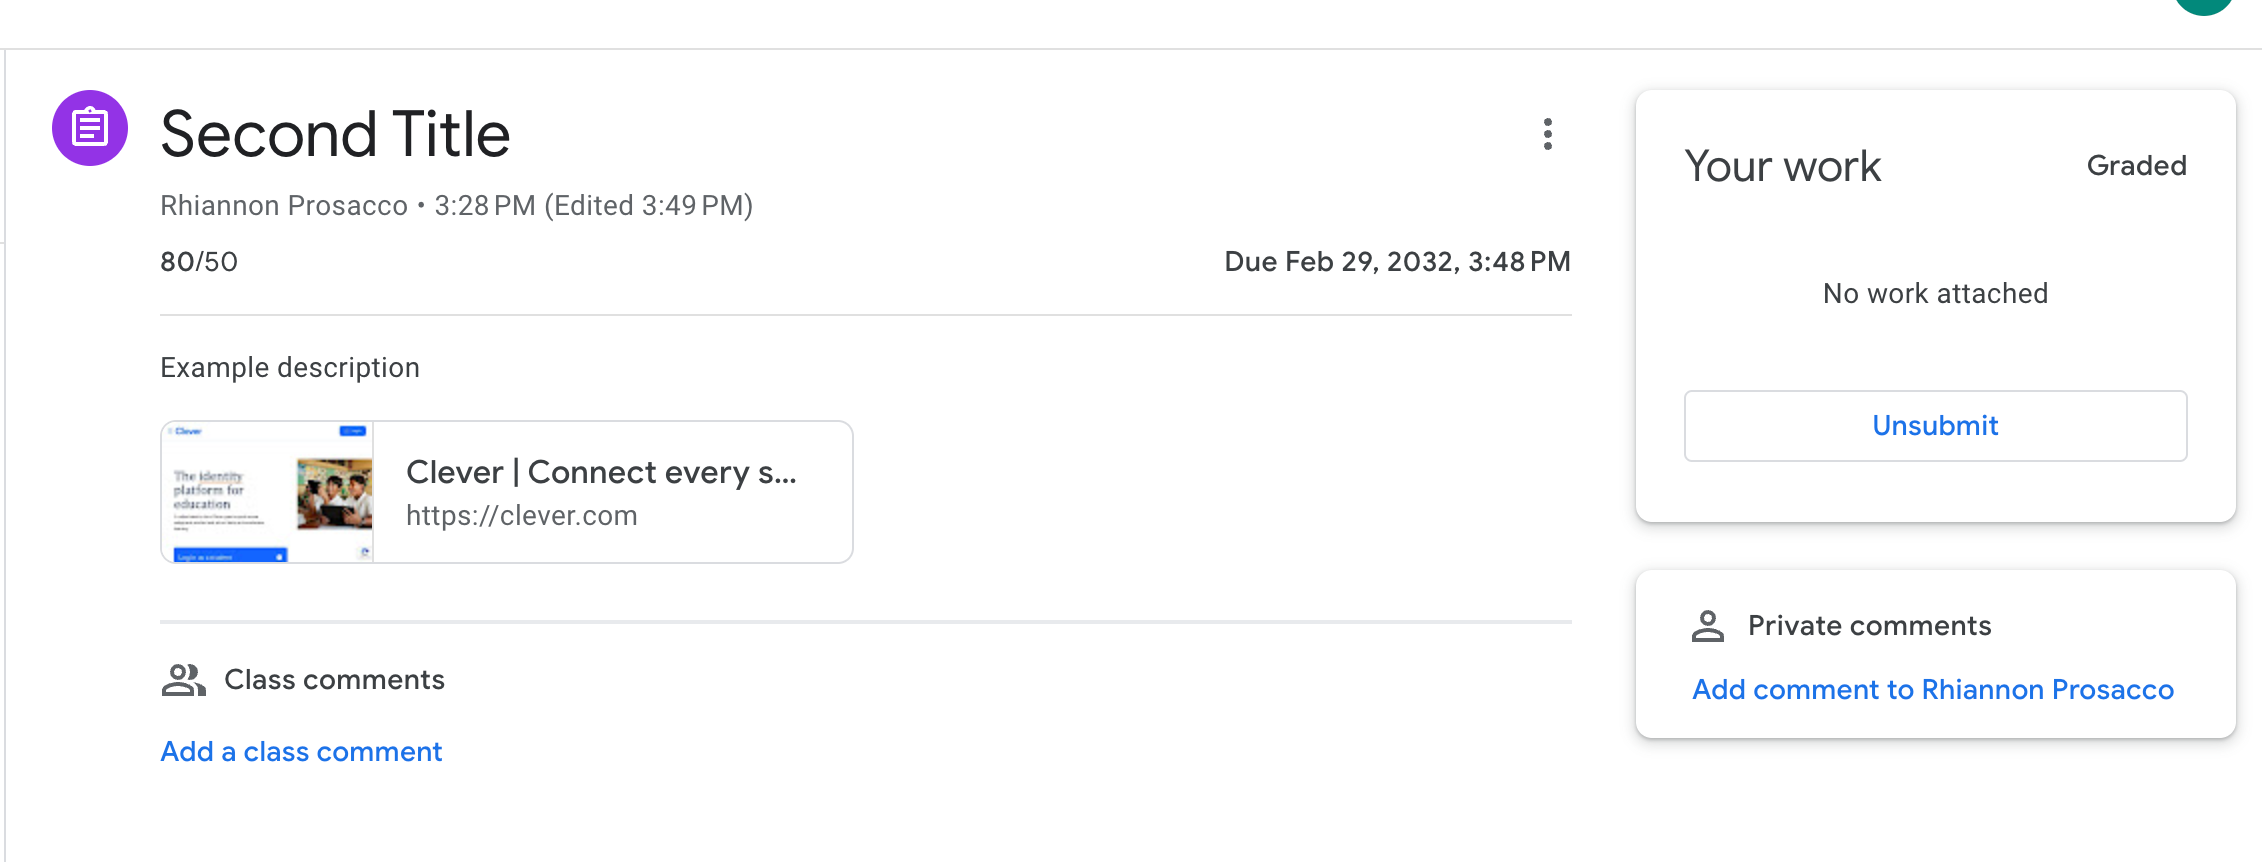
The graded submission from the student view
Canvas
Teacher
You can confirm the creation of your assignment by logging in to Canvas as the demo teacher.
- Navigate to clever.instructure.com
- Sign In
- email: [email protected]
- password: clever_demo
- Click into the section (course) named "Study 5(2)".
- You should be able to see your assignment on this page.
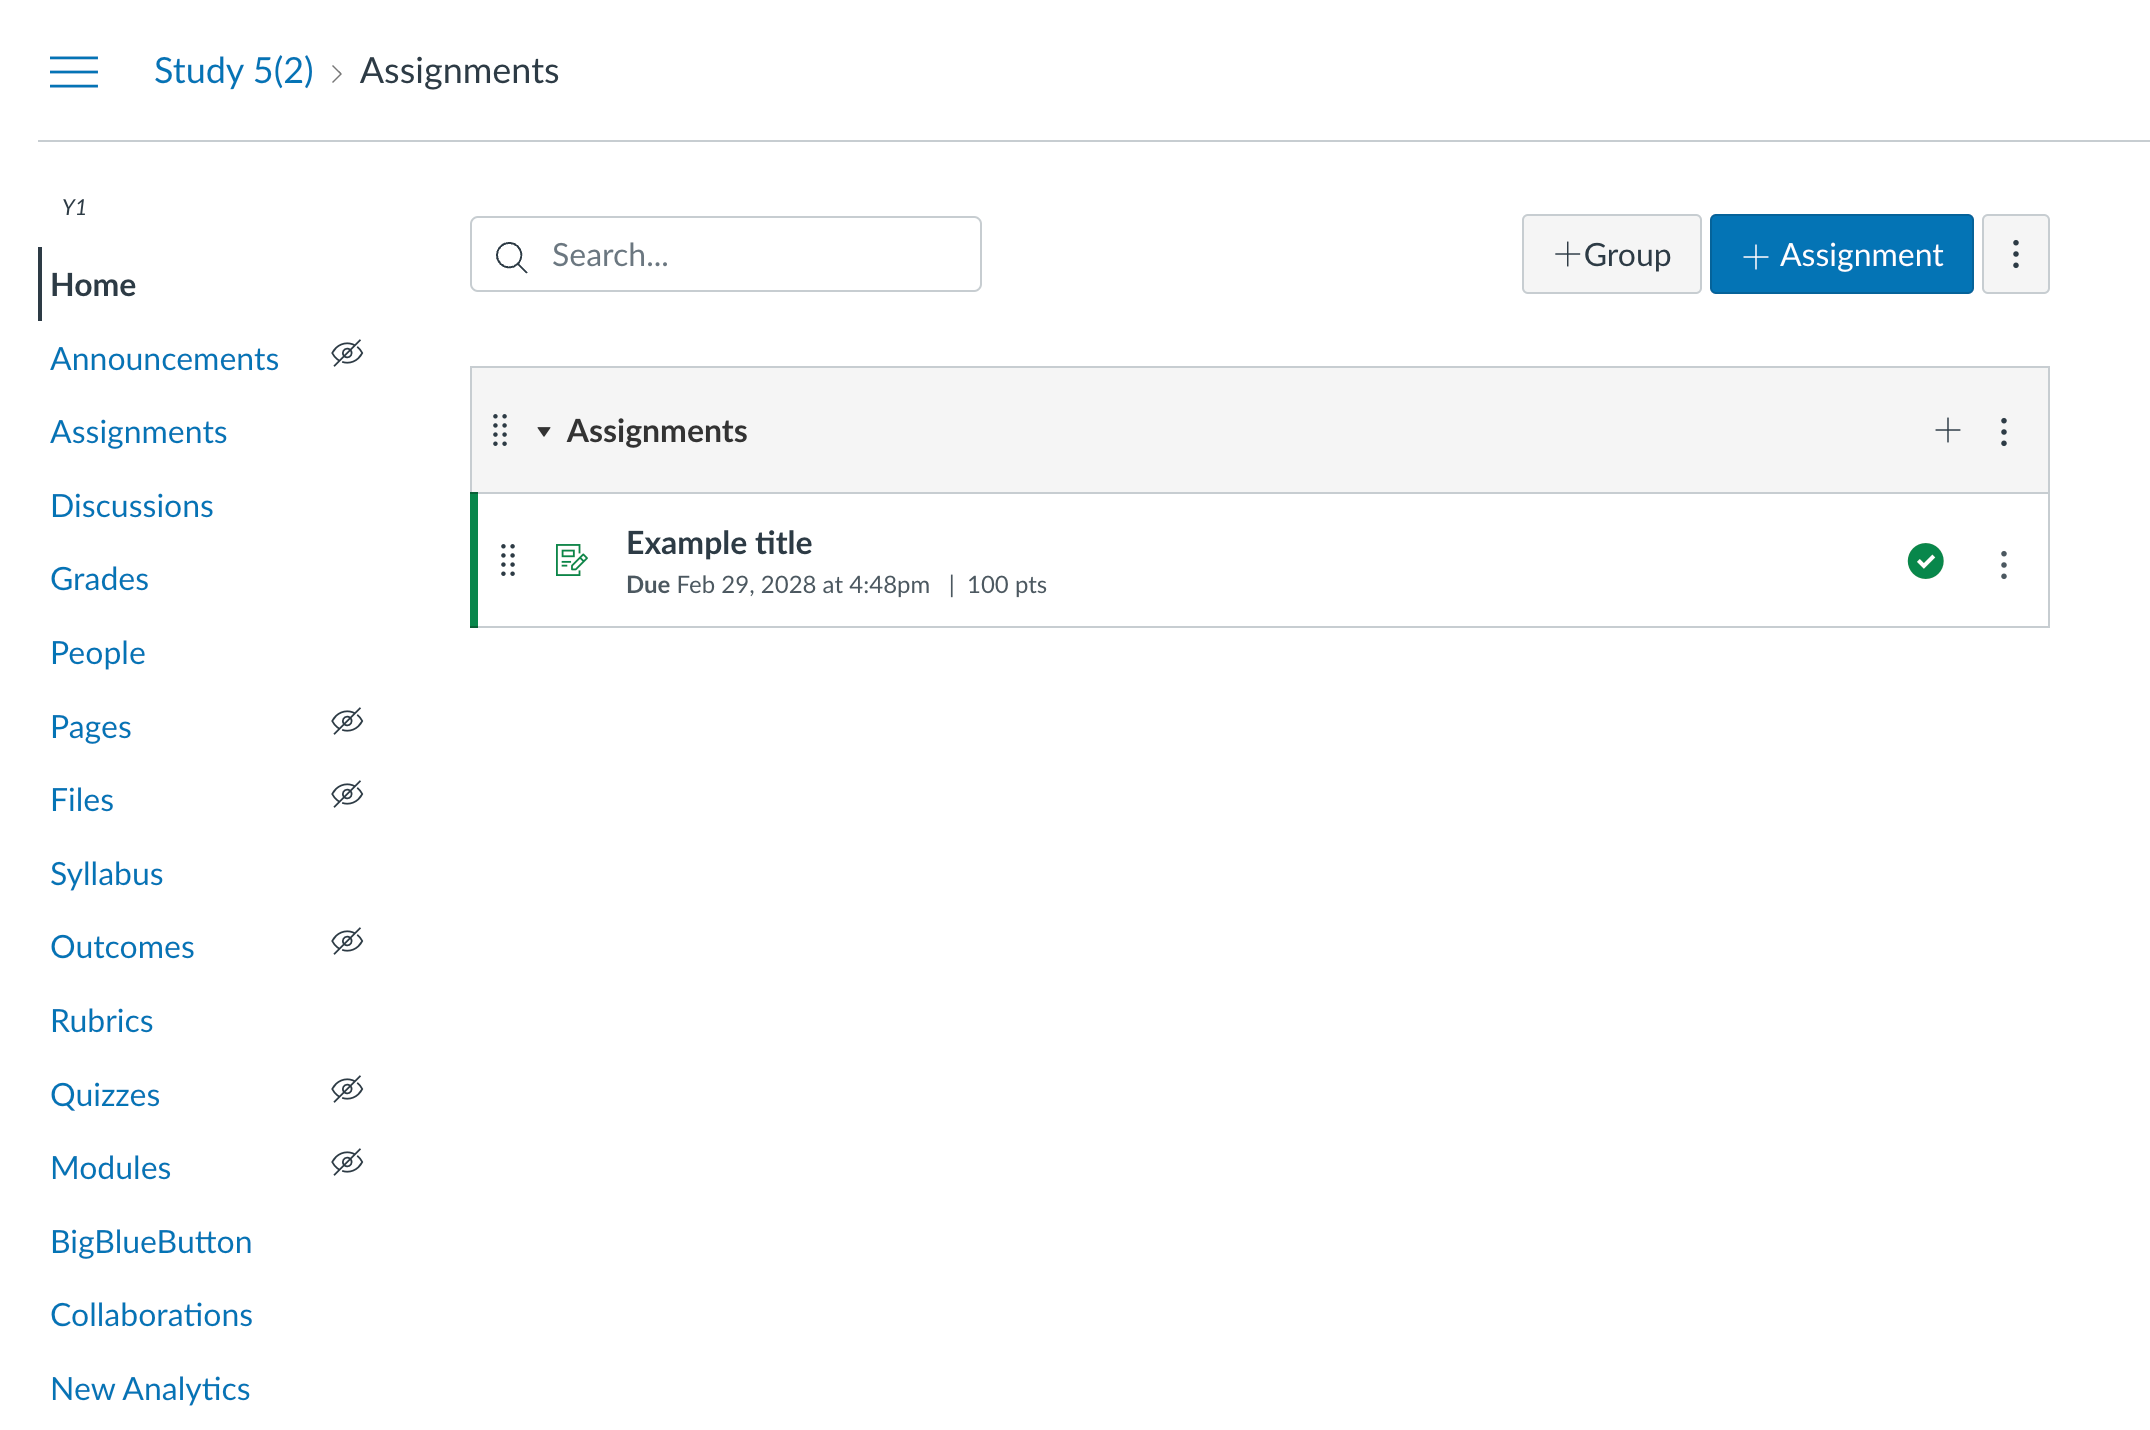
Section: Study 5(2) from the teacher view

After updating the assignment from the teacher view
Student
Once you've created a submission, you can also take a look from the student perspective.
- Navigate to clever.instructure.com.
- Sign In
- email: [email protected]
- password: clever_demo
- Click into the section named "Study 5(2)".
- You should be able to see the student submission and score.

The graded submission from the student view
Schoology
Teacher
You can confirm the creation of your assignment by logging in to Google Classroom as the demo teacher.
- Navigate to app.schoology.com.
- Sign In
- email: [email protected]
- password: clever_demo!
- Click into Courses > "Homeroom 1-6(HR)".
- You should be able to see your assignment on this page.
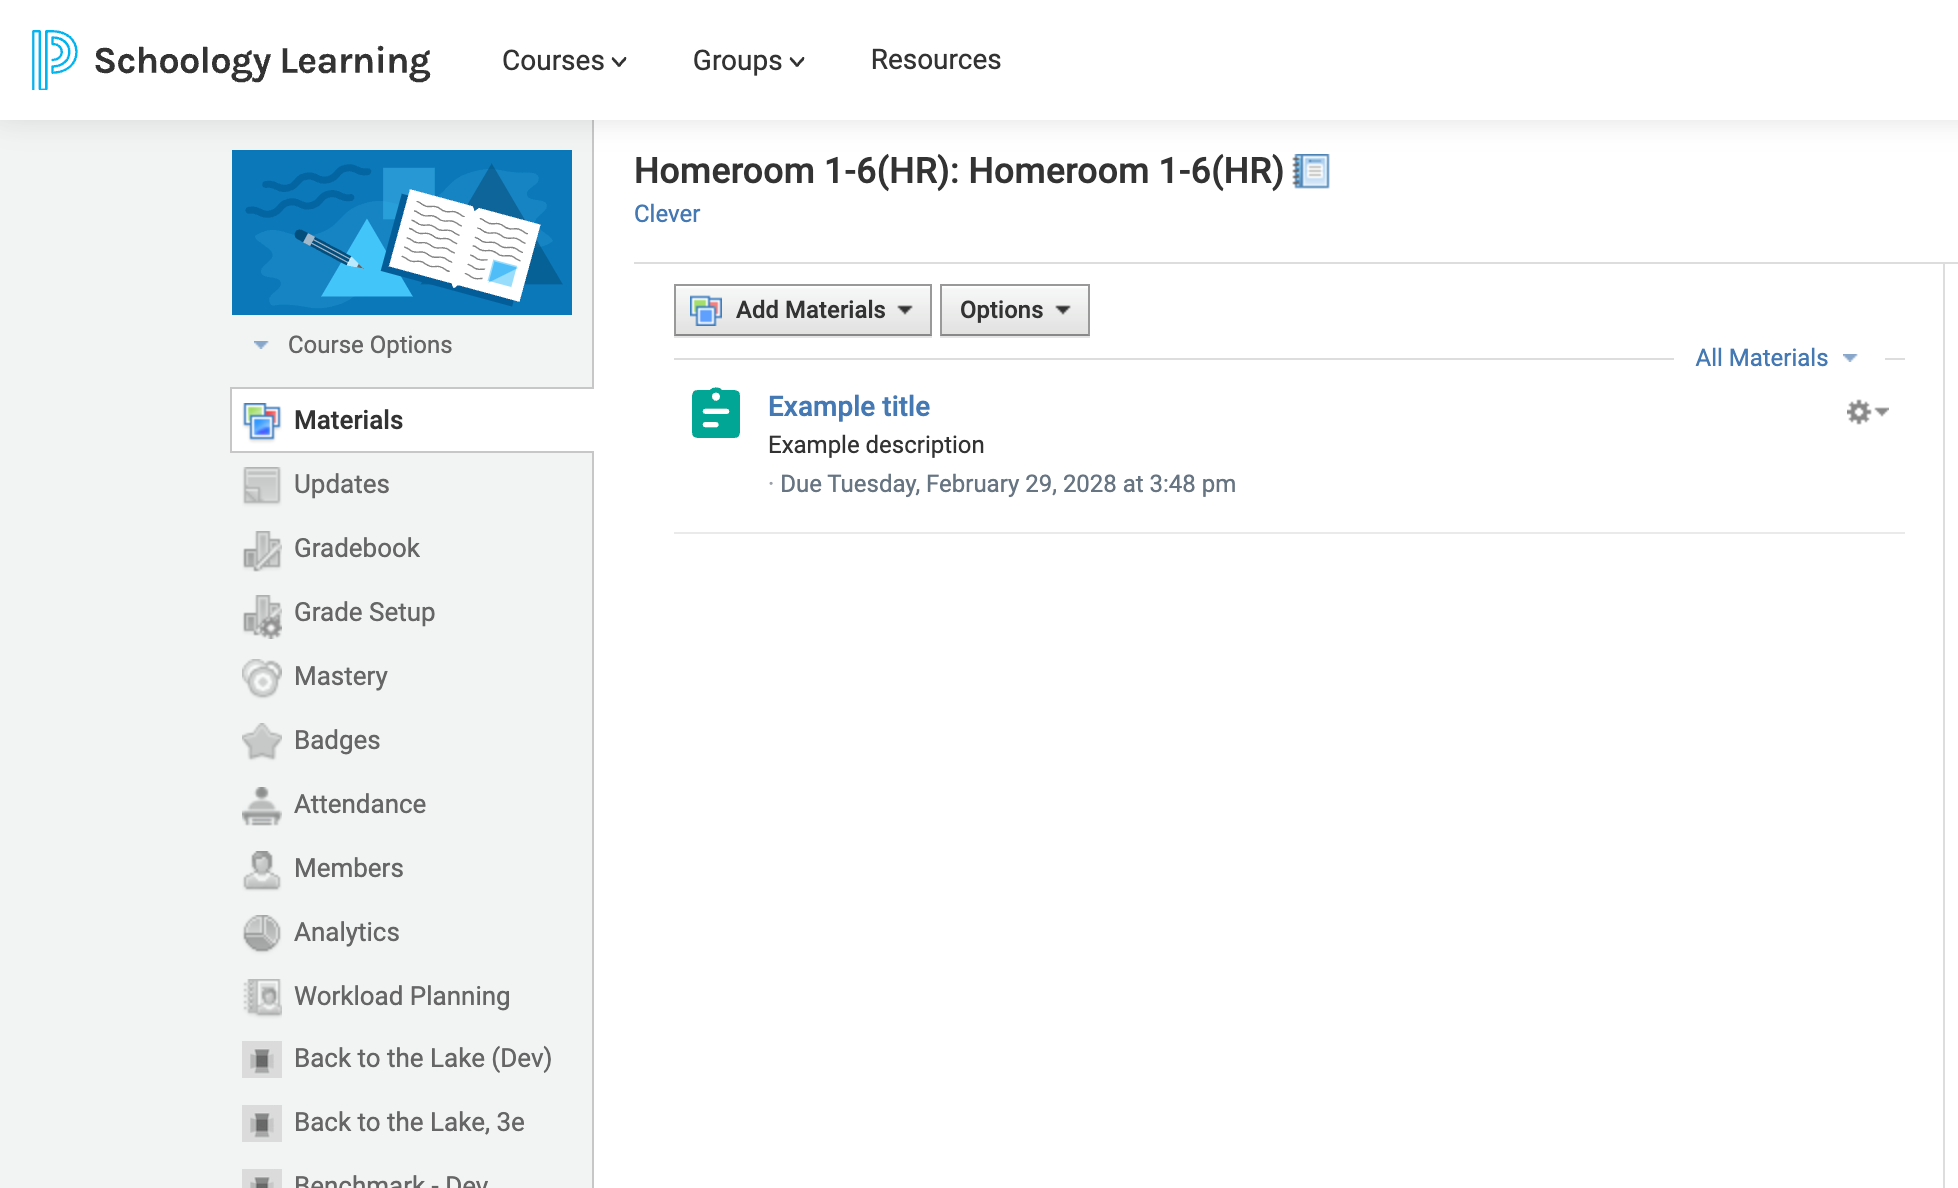
Section: Homeroom 1-6(HR) from the teacher view
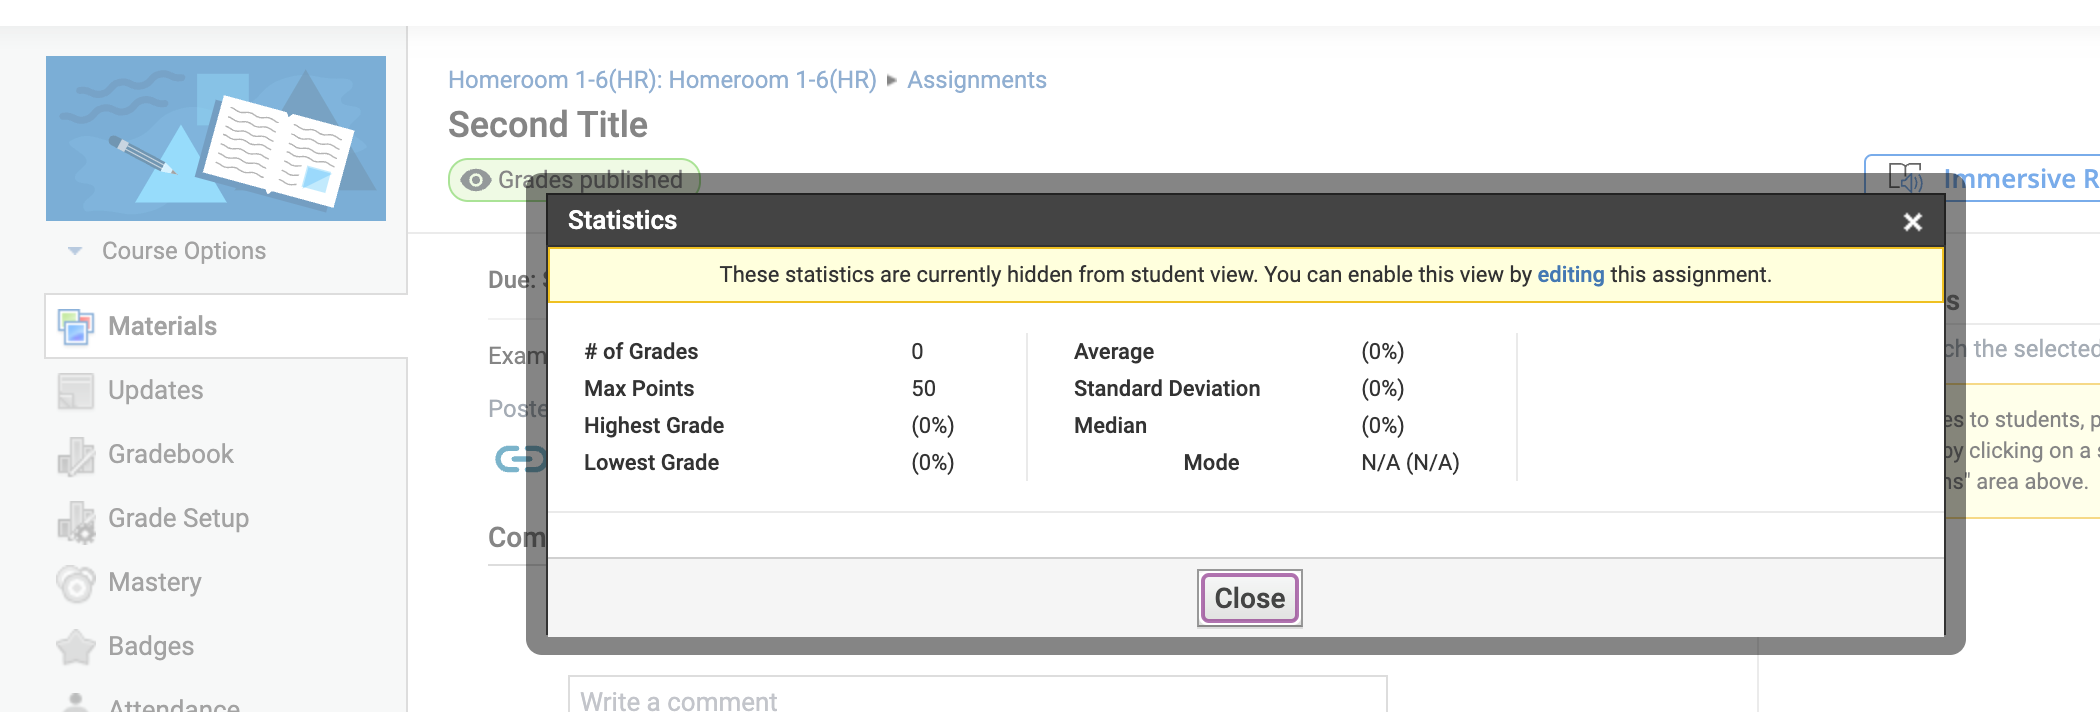
After updating the assignment from the teacher view
Student
Once you've created a submission, you can also take a look from the student perspective.
- Navigate to app.schoology.com.
- Sign In
- email: [email protected]
- password: clever_demo!
- Click into Courses > "Homeroom 1-6(HR)".
- You should be able to see the student submission and score.
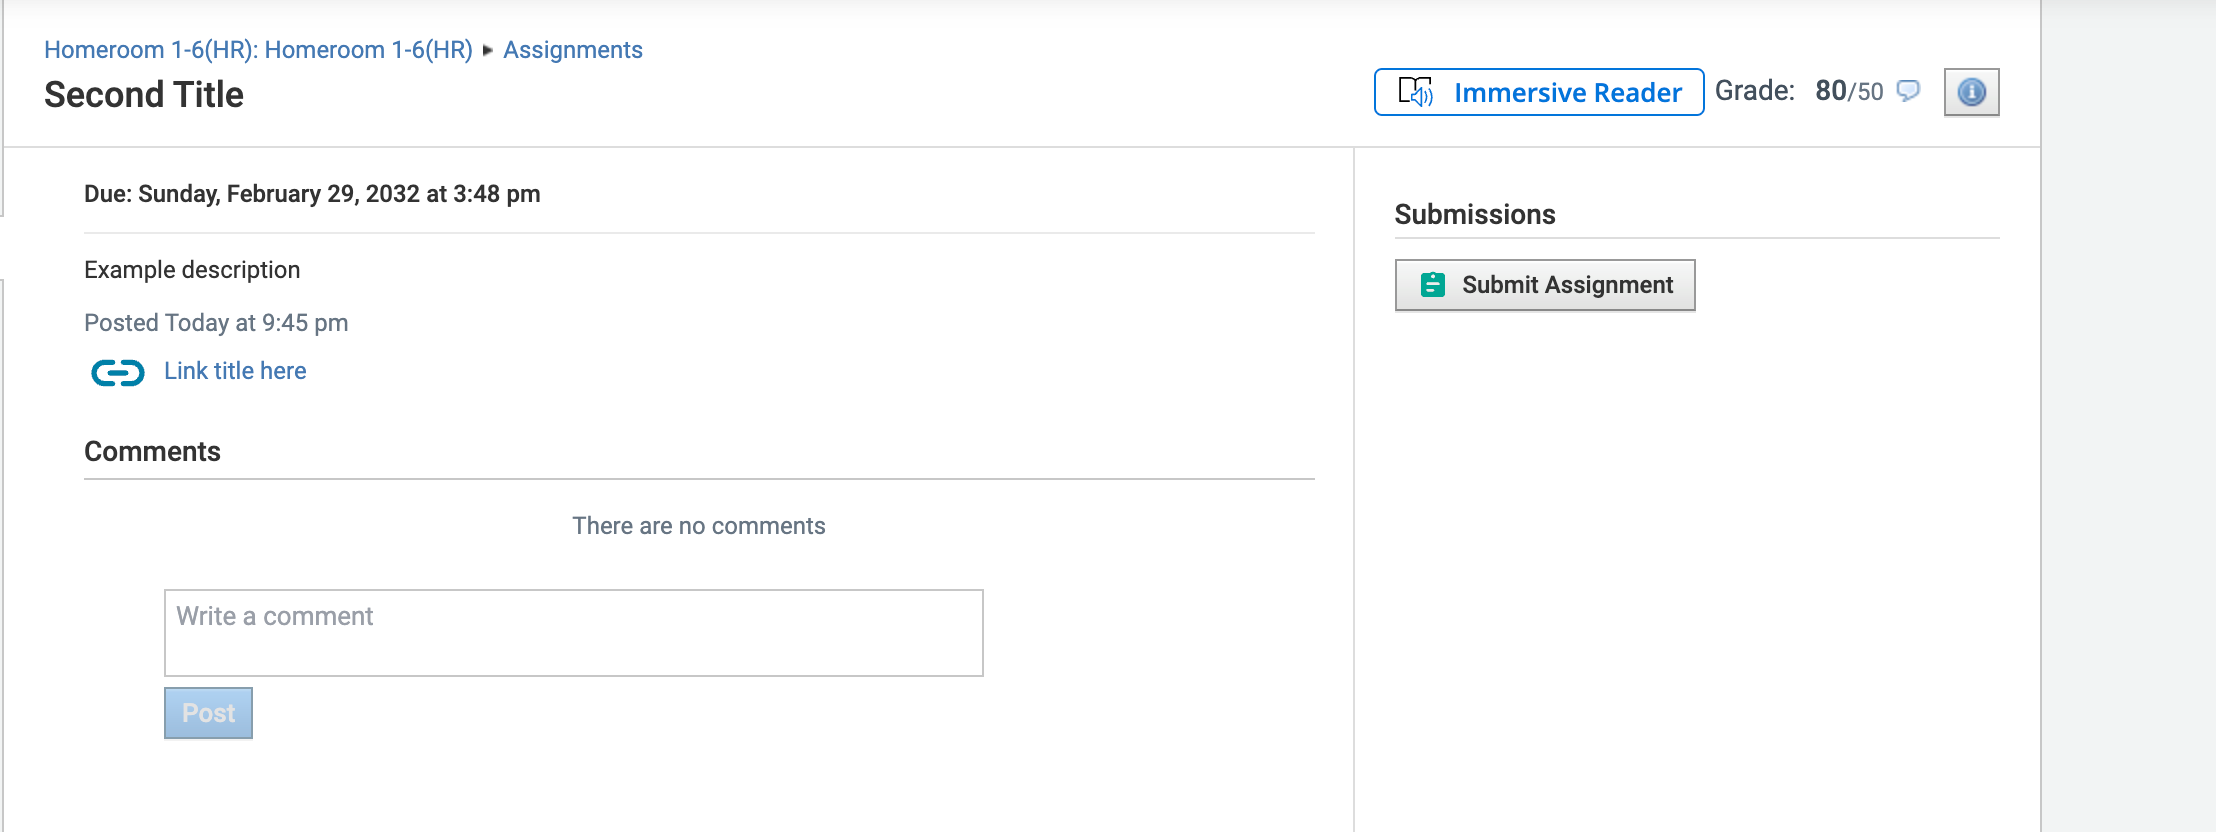
The graded submission from the student view
Updated 5 months ago
