

Clever AnySchool Quickstart Guide
Invite and test AnySchool districts as an app partner, or share district-facing instructions for connecting supported SIS, CSV, and SFTP roster data sources.
Clever Complete Agreement RequiredThis feature is included with a Clever Complete subscription. Sign up here or email your Application Success Manager to learn more.
Table of Contents
Clever AnySchool Rostering
For App Partners
For District Administrators: Set Up an AnySchool Data Source
Clever AnySchool Rostering
Use AnySchool to roster schools that are not already on Clever through your Clever Secure Sync integration.
AnySchool is included with a Clever Complete integration and extends Secure Sync for schools that are not on Clever. You do not need to build or maintain a separate integration. After a district administrator connects a data source, Clever exposes the data through the Clever API using the same schema as other Secure Sync districts.
The setup flow is hosted by Clever and white-labeled to align with your application’s branding.
Supported roster data sources
- Infinite Campus (API v1.2)
- Skyward
- Blackbaud
- Additional OneRoster API connections
- CSV upload (
users.csv,sections.csv)- SFTP Directory
For App Partners
Complete these steps in your Clever App Dashboard. You can then share the district administrator section of this page with the person who will connect the district’s roster data.
Enable AnySchool for your application
To learn more about AnySchool or request a demo, contact your Application Success Manager. If your app is still in development, contact Partner Engineering at [email protected].
Invite an AnySchool district
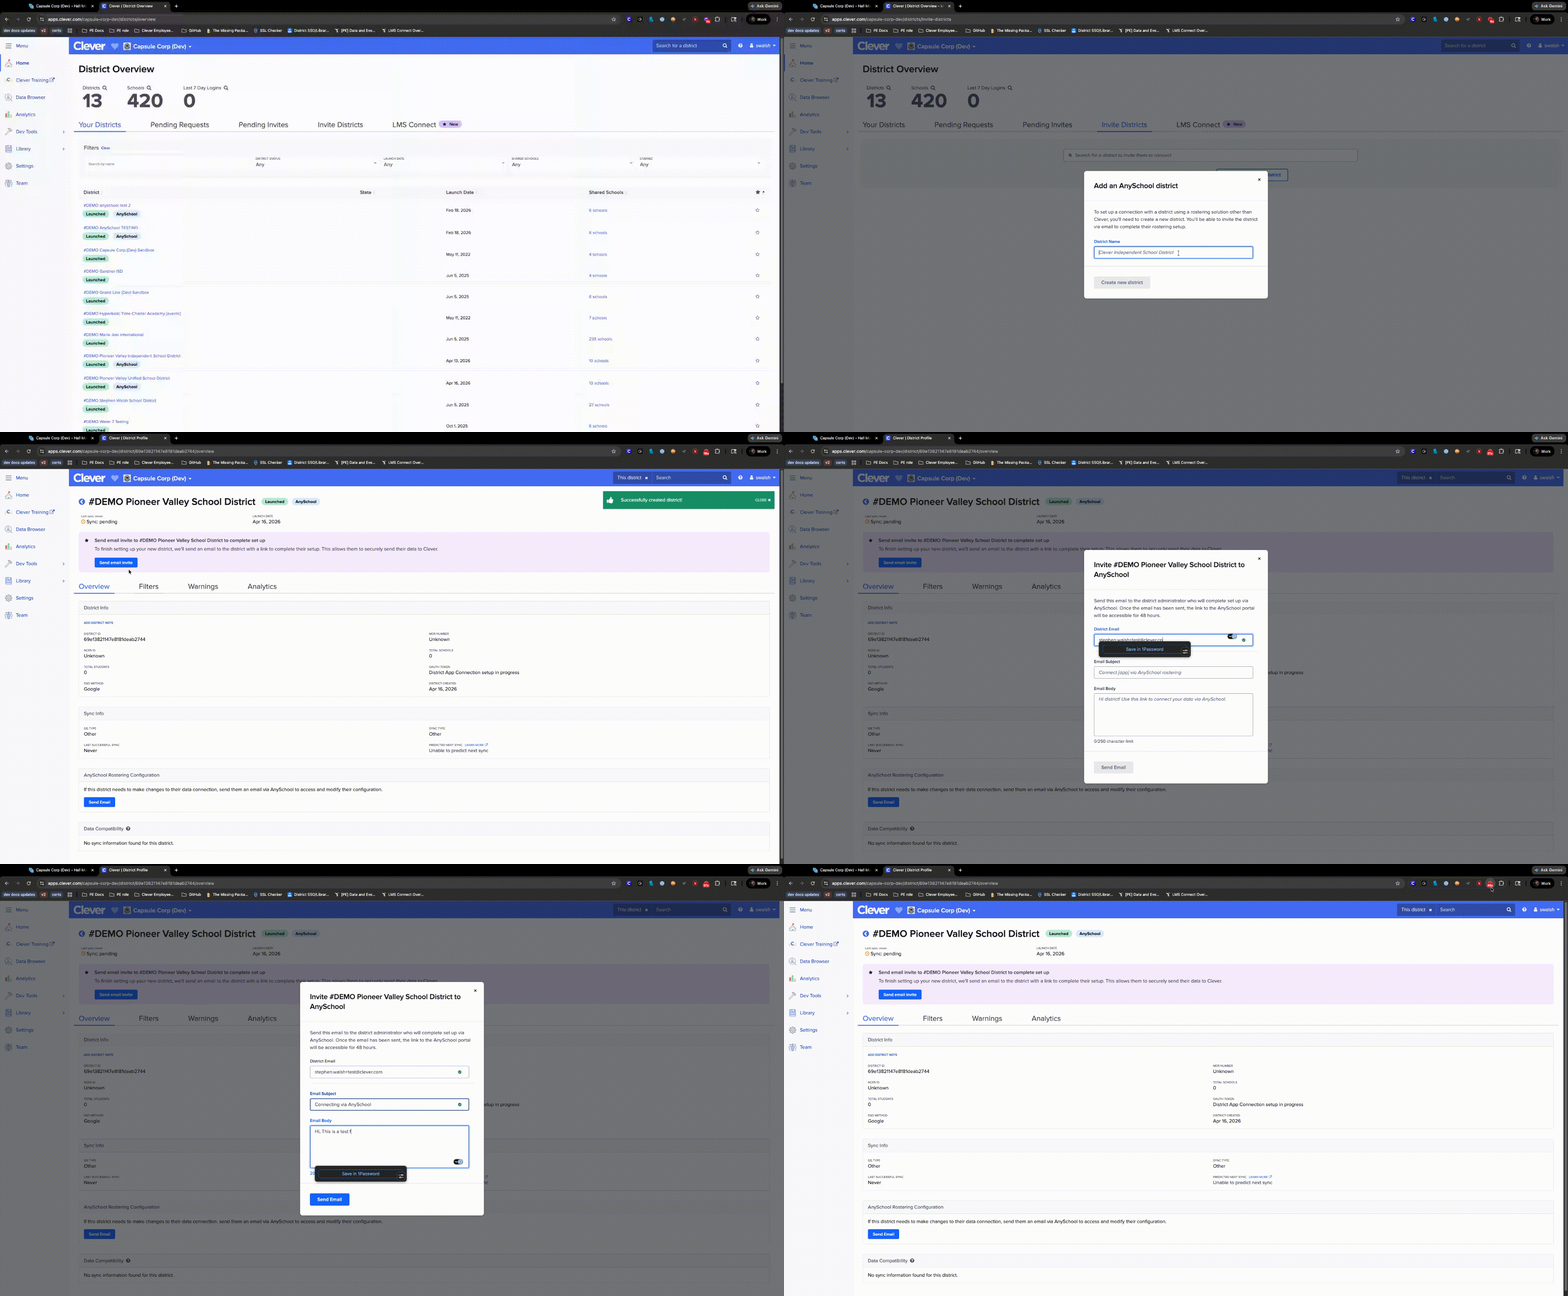
- In the App Dashboard, go to Home > Invite Districts > Add an AnySchool District.
- Enter a name for the district.
- Clever uses this name to identify the district in the context of your application’s connection.
- On the district overview page, select Send email invite.
- Enter the district administrator’s email address.
- Ask the district administrator to complete For District Administrators: Set Up an AnySchool Data Source.
After Clever processes the district’s data, the district data is available through the Clever API. Use the district-app token to query the district as you would any other Secure Sync district. For request guidance, see Exploring the Clever API.
For additional invitation guidance, see For App Partners: Rostering schools via the AnySchool district setup flow.
Match existing records
When you convert an existing customer to an AnySchool sync, match the customer’s existing records to the data coming through Clever. You can build your own matching workflow or use Clever Matchmaker to bootstrap matches for students, teachers, sections, and schools.
For matching guidance, see Matching Records.
Optional: Test your sync with AnySchool
Test your application’s CSV upload workflow and downstream API behavior before inviting a live district.
- Contact your Application Success Manager. Provide your development app’s client ID and request that AnySchool be enabled for the app.
- In the App Dashboard, go to Home > Invite Districts > Add an AnySchool District.
- Create a test district and select Send email invite from the district overview page.
- Enter an email address you can access as the district email address.
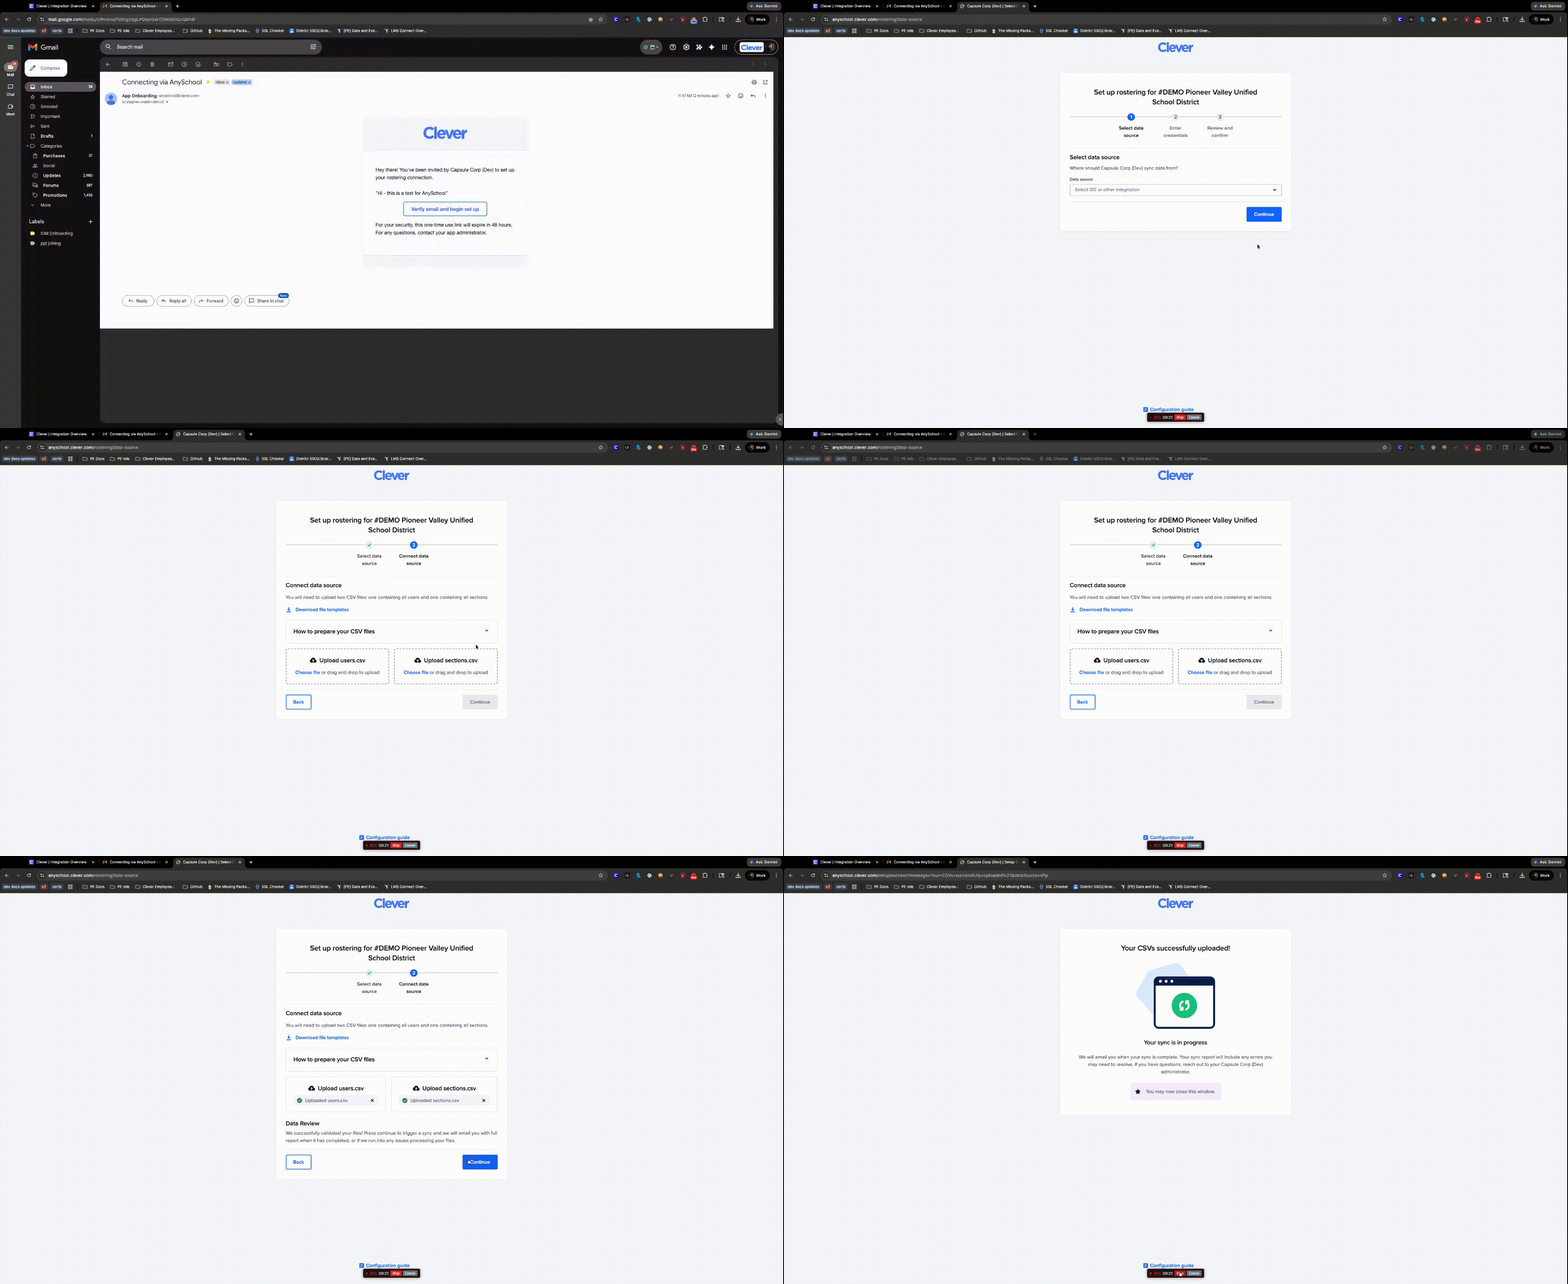
- Open the invitation email, verify the email address, and start the AnySchool setup flow.
- Select CSV Upload as the data source.
- Download the sample CSV files:
- Upload both files through the setup flow, then select Save.
After Clever processes the upload, you receive an email at the district email address. Retrieve the district-app token and query the Clever API to verify the data.
Pre-launch checklist
- Confirm AnySchool is enabled for your development app before inviting districts.
- Confirm the district’s data source is supported.
- Test the invitation, data-source setup, processing, token retrieval, and API query flow end to end.
- Use a matching plan for existing customer records.
- For CSV and SFTP Directory, validate both
users.csvandsections.csvbefore upload. - Reuse your Secure Sync data-consumption logic after the district’s data is available.
Test workflow recordings
Invite an AnySchool district
Upload CSV data
For District Administrators: Set Up an AnySchool Data Source
Share these instructions with the district administratorComplete the following steps after accepting the AnySchool invitation from your application. These steps connect your roster data to Clever; your application partner cannot complete them for you.
The exact fields and instructions vary by selected data source.
- Open the AnySchool invitation email and follow the link to start setup.
- Select a supported data source.
- Enter the requested credentials or complete the provider-specific connection steps.
- Optionally select an SSO provider.
- Review the configuration and confirm the setup.
- Wait for Clever to process the roster data.
After processing completes, the data is available to the application through the Clever API using the same schema as other Secure Sync districts.
Data source requirements
| Data source | Setup workflow |
|---|---|
| Infinite Campus | Enter the base URL, client ID, and client secret requested by the setup flow. |
| Skyward | Enter the base URL, client ID, and client secret requested by the setup flow. Use the credential help link in the setup flow if you need help locating these values. |
| Blackbaud | Select Blackbaud, then complete the credential step shown in the AnySchool setup flow. |
| ClassLink | Sign in to ClassLink Launchpad. Open the three-line menu, then go to Roster Server > Manage > Applications. Select + Add, search for the application, select + Add next to it, and configure the data-sharing permissions. Return to the AnySchool setup flow and confirm that you completed the ClassLink connection. |
| Additional OneRoster API connections | Contact the application partner to confirm availability and receive setup guidance. |
| CSV upload | Select CSV Upload, then upload the users.csv and sections.csv files. |
| SFTP Directory | Select SFTP Directory to generate credentials for an automated roster-file upload. Upload users.csv and sections.csv to the anyschool subdirectory. |
SFTP Directory uploads
SFTP (Secure File Transfer Protocol) lets you automate roster-file transfers instead of completing one-time manual CSV uploads. Both methods use the same processing backend, but SFTP Directory provides persistent credentials for automated transfers.
- Select SFTP Directory as the data source.
- Record the SFTP credentials displayed in the setup flow:
- SFTP upload URL:
sftp://sftp2.clever.com - SFTP port:
22 - SFTP username: Automatically generated for the school organization.
- SFTP password: Automatically generated. Select the eye icon in the setup flow to reveal it.
- SFTP upload URL:
- Connect an SFTP client with these credentials.
- Upload the required files to the
anyschoolsubdirectory:users.csvsections.csv
- Confirm that Clever retrieved and normalized the files without errors.
If the setup flow displays a Failed to provision SFTP credentials error, select Try again. If the error continues, contact the application partner’s support team.
Upload files to the exact required subdirectory. Uploading files to another directory causes the Clever normalizer to reject the data.
For complete setup instructions and troubleshooting, see SFTP Directory uploads.
Optional: Set up SSO
You can select an optional SSO provider separately from the roster data source. Available providers include:
- Canvas
- ClassLink
- Microsoft Entra
- Microsoft ADFS
- RapidID
- Okta
If you use ClassLink for roster data, select ClassLink as the roster data source and configure the ClassLink connection as described above. For identity providers outside this list, contact the application partner’s support team.
For more setup guidance, see Rostering applications with AnySchool.
Updated about 1 month ago